Wimbledon Tile Cleaning

Wimbledon Tile Cleaning

Welcome to my Work History archive where you will find examples of the cleaning and renovation of tiles carried out in Wimbledon.

Black Slate Kitchen Floor Renovation Tooting

Black Slate Tiled Kitchen Floor Renovated in Tooting

The photos below are of a Black Slate Kitchen floor at a property in Tooting SW17, which as you can see had lost all its colour and character. I went over to survey the floor and discussed a renovation plan with the owner.

One of the problems was the grout which like the tile hadn’t faired very well over the years and being in the Kitchen was subject to staining. I explained that like all stone floors the Slate needed to be sealed in order to keep the dirt out of its pores and keep it looking its best. Sealers however wear down with use and in this case the floor hadn’t been deep cleaned and sealed for some time.

I costed out a renovation plan which included deep cleaning the Slate tile removing any remaining sealer in the process, renovating the grout, and then re-sealing the whole floor to bring back the appearance of the stone and protect it going forward. Happy with the quote we agreed a date to start the work.

Deep Cleaning a Natural Black Slate Tiled Kitchen Floor

Normally I would use a Tile Doctor product called Remove and Go to remove the sealer, however in this case testing had shown that what was left of the sealer could be removed with Pro-Clean which is also our go to Tile and Grout Cleaner.

I used a strong dilution of Pro-Clean to do this, spraying it onto the floor and leaving it to soak in for ten minutes and break down the dirt etc. Then using a black scrubbing pad fitted to a heavy rotary buffer machine it was worked into the Slate to release the dirt and old sealer. The floor was then rinsed with water and the soiling extracted with a wet vacuum.

The pads can struggle to get into the corners and edges of the floor and the recesses of the grout line. So, to complete the cleaning a handheld scrubbing brush was used and a wire brush run along the grout lines, again with more Tile Doctor Pro-Clean. After another rinse and extraction with the wet vacuum the floor was left to dry aided with a couple of floor blowers.

Grout Colouring and Sealing Black Slate Tiled Kitchen Floor

Once dry the grout was coloured with a Black Tile Doctor grout colourant which is basically painted onto the grout with a small brush and any excess wiped off the tile. This grout colourant gives the grout a uniform appearance and adds an impenetrable barrier over the grout sealing it in and keeping it safe from further staining. Keeping grout clean in a kitchen is always a problem so the colourant will protect it and make it very easy to clean.
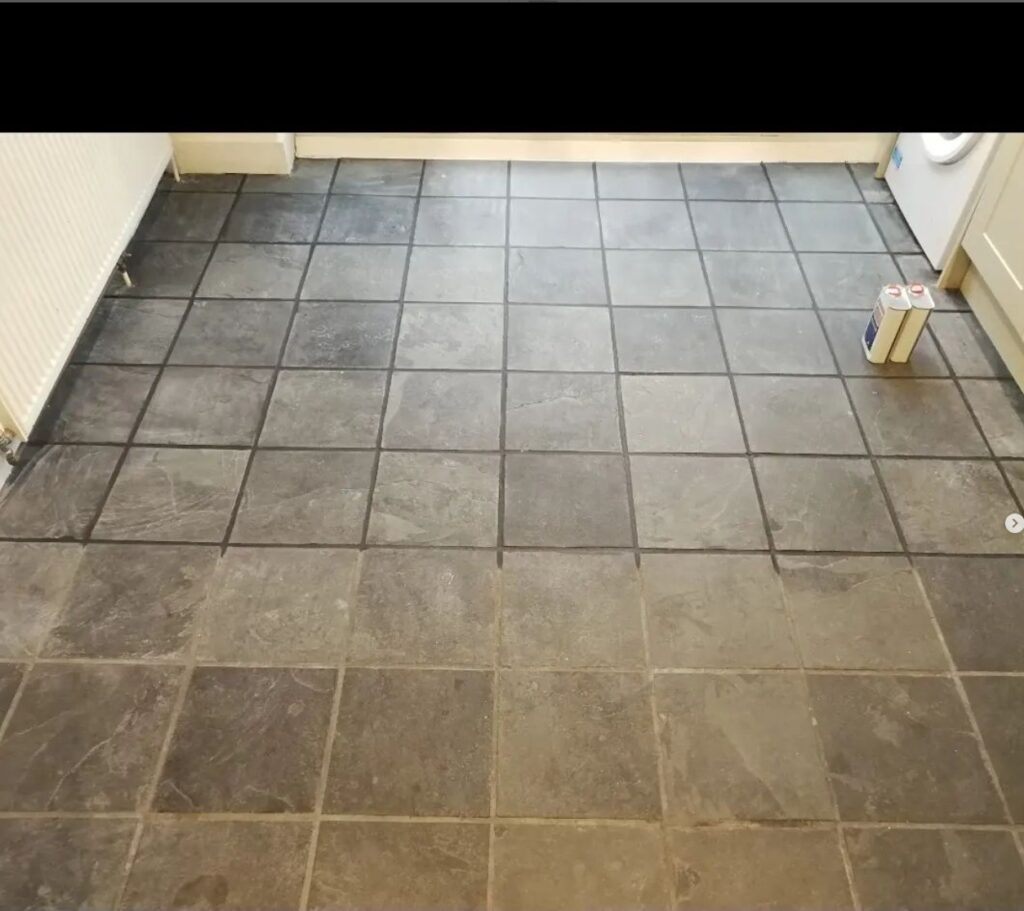
Black Slate During Cleaning Grout Colouring Tooting

The last step was to seal the Slate for which I used Tile Doctor X-Tra Seal. This was chosen because it’s an impregnating oil-based sealer that will restore the beautiful dark colour in the stone. Impregnators work by occupying the tiny pores in the stone thereby forcing dirt to remain on the surface where they can easily be cleaned away.
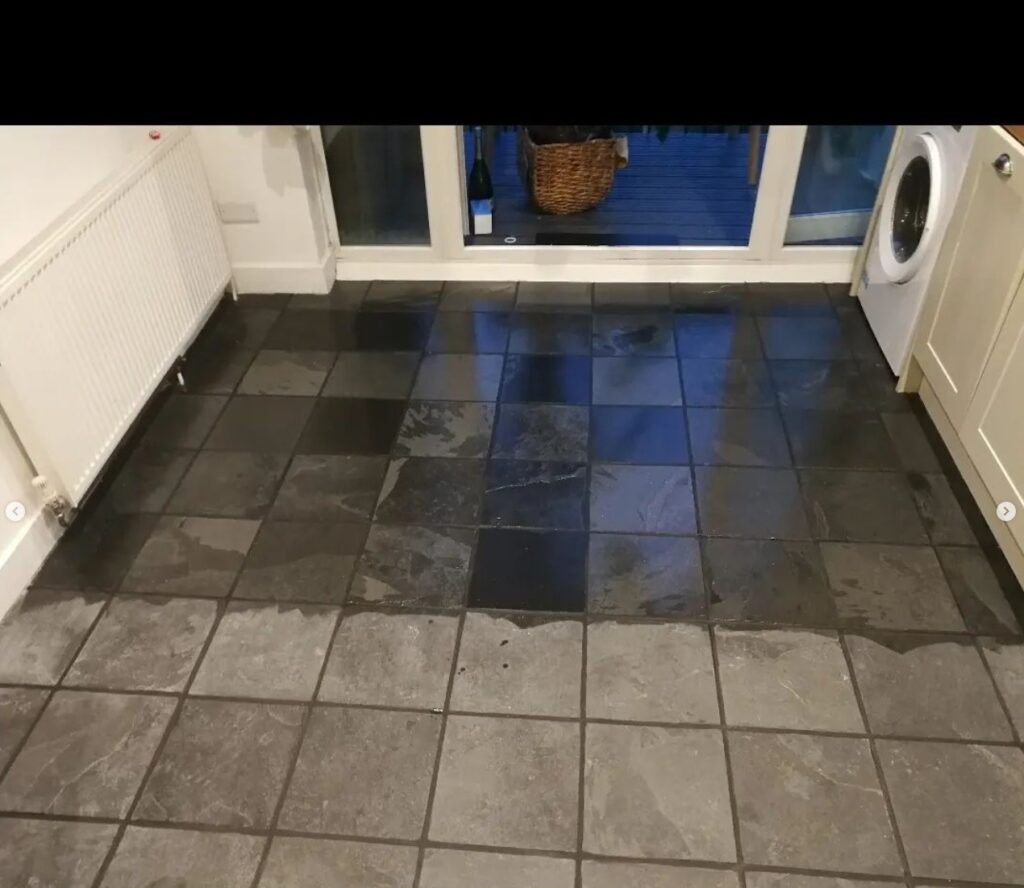
Black Slate During Sealing Tooting

In the subject of maintenance cleaning, I recommend the use of Tile Doctor Neutral Tile Cleaner which is a gentle but effective cleaner that won’t harm the sealer. Many of the floor cleaning products you find in supermarkets etc are not for use on sealed stone, they contain strong chemicals such as bleach etc which will strip off the sealer prematurely so best avoided.

Black Slate After Renovation Tooting


Professional Renovation of Black Slate Tiled Kitchen Floor in South London

Black Slate Tiled Kitchen Floor Renovated in Tooting Read More »

Amtico Vinyl Floor Before Cleaning After Sealing Wimbledon

Maintaining Amtico Vinyl at Wimbledon Hair Salon

Most people don’t realise this but Amtico recommend their floors are protected against scuffs and scratches with a sealer or floor care dressing as they call it and like any product you apply to a floor it will wear off over time due to the constant abrasion of floor traffic. This is very similar to the problem we face with tile and stone most of which also benefit from the protection of a sealer.

With this in mind I was asked to visit a Hair Salon in Wimbledon which as well as being famous for its annual Tennis tournament is a large town to the southwest of London. Their Amtico flooring had lost a lot of its appearance and a recent redesign had exposed a few obvious areas where equipment was once positioned. It was clear that the whole floor would need to be stripped of what was left of its protective coating and resealed.

Amtico Floor Wimbledon Hair Salon Before Cleaning

Deep Cleaning Amtico Flooring

It was necessary to strip the floor of its old coating first as to apply a fresh sealer would simply have locked in the dirt and led to different layers of sealer on the floor which can leave some areas looking darker than others.

To strip off the old coating and clean the we used Tile Doctor Vinyl Strip mixed with hot water. This was left to sit on the floor for a short while before being scrubbed in with a scrubbing pad fitted to a rotary floor buffer and then the soil was removed using a wet and dry vacuum. It’s worth noting that to scrub this floor we used a finer scrubbing pad than normal because using a black stripping pad would have scratched the Vinyl. We then rinsed the floor twice with water to remove any residue and extracted the water with a wet vacuum.

Normally we these jobs we would look to let the floor dry off overnight and come back the next day to seal the floor, however given the commercial nature of the business this was not a practical option so the Amtico floor was force dried using industrial air movers.

Sealing Amtico Flooring

Once the floor was dry we were able to press on with the application of the sealer which for Amtico and other Vinyl flooring we recommend Tile Doctor Vinyl Shine floor polish which leaves a nice subtle shine. You have to wait for a coat to dry (approx. 30 minutes) before applying the next, so this process can take a while to complete, in this case three coats were applied to achieve the desired finish.

Amtico Floor Wimbledon Hair Salon After Cleaning

We managed to strip and seal the whole floor in a day, so the owner was able to open for business on the Monday.

Amtico Floor Wimbledon Hair Salon After Cleaning


Dirty Vinyl Flooring Cleaned and Sealed at a Hair Salon in South London

Maintaining Amtico Vinyl at Wimbledon Hair Salon Read More »

Old Victorian Tiled Hallway Renovated in Tooting

Old Victorian Tiled Hallway Renovated in Tooting

We were asked by the customer in Tooting, if we could restore this Victorian tiled hallway floor that they had found underneath a carpet while they were refurbishing their property. Interestingly he had already had a quote from another company, but they were unable to identify what type of tile it was. Old floors like these are not for the in-experienced and if you look closely at my website you will see I have published over 60 detailed accounts of tile cleaning and restorations since 2012.

Victorian Tiled Hallway Before Restoration Tooting Victorian Tiled Hallway Before Restoration Tooting

I could see there was a lovely Victorian Tiled floor hiding underneath the paint spots and plaster dust and carried out a test patch to show him what the floor would look like when it was clean. I also showed him pictures of similar floors that we have restored over the years and was able to show the finishes you can achieve from different sealers. Convinced I was the chap for the job he booked me in there and then.

Cleaning a Heavily Soiled Victorian Tiled Floor

Returning on the agreed date we started the cleaning process by pre-wetting the floor with water. This was followed by the application of a strong dilution of Tile Doctor Remove and Go which was left to soak in for approximately ten minutes. This product is designed for the safe removal of old coating such as sealers from Tile, Stone and Grout and I knew it would be ideal for the task. The solution was then scrubbed into the Victorian tile and gout using a rotary machine fitted with a black stripping pad. The scrubbing process released a lot of the stains and dirt from the floor which were then extracted with a wet vacuum. The process was then repeated until all the sections were treated.

The floor was then rinsed with water and the resultant residue extracted using a wet vacuum before treating the tiles to an Acid Wash to neutralise any alkaline salts and remove mineral deposits and old grout smears. This was done by applying Tile Doctor Acid Gel for around fifteen minutes and then removing it with a final rinse.

Cleaning the hallway took up most of the day and I needed the tiles to be dry before the next step of applying a sealer, so after discussing progress with the owner I left for the day and gave the floor three days to dry out.

Sealing a Victorian Tiled Hallway

On our return I first checked the floor with a damp meter to make sure it had dried out thoroughly. All was well, so we proceeded to seal the tiles using Tile Doctor Colour Grow which is an impregnating sealer that leaves a matt finish and soaks into the pores of the tile protecting it from within and enhancing its appearance in the process.

Victorian Tiled Hallway After Restoration Tooting Victorian Tiled Hallway After Restoration Tooting

Four coats of sealer were needed and as you can see by the final pictures the hallway now looks fantastic and needless to say the customer was over the moon with the final results.

Victorian Tiled Hallway After Restoration Tooting
 

Professional Victorian Tiled Hallway Cleaning in South London

Old Victorian Tiled Hallway Renovated in Tooting Read More »

Black Limestone Floor installation problems resolved in Wimbledon

Black Limestone Floor installation problems resolved in Wimbledon

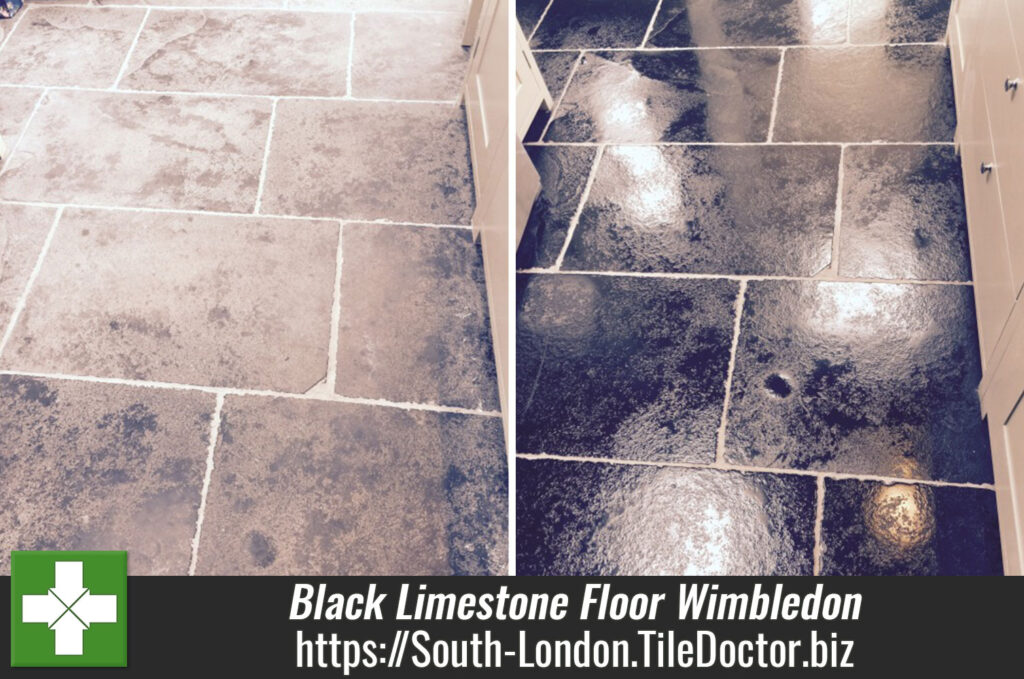
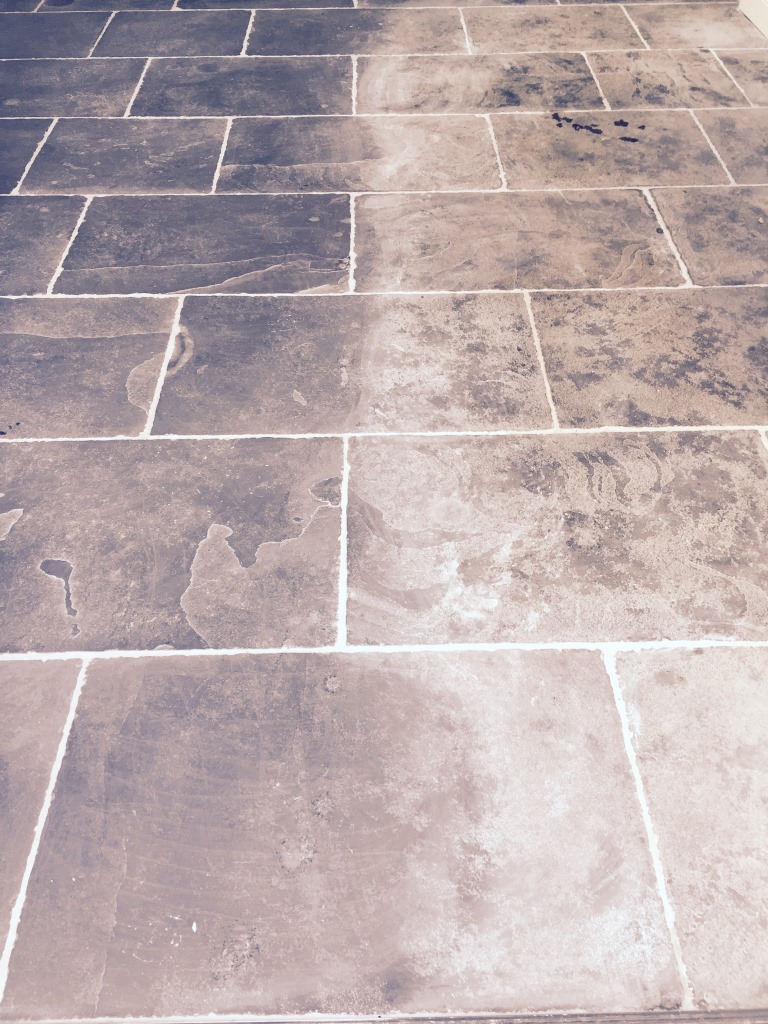
I was recently asked to this property in Wimbledon in to see if there was anything we could do to resolve the problem with a recently laid Black Limestone tiled floor. The builders that had laid the Limestone did not cover or clean the tiles prior to sealing with an impregnating seal thereby trapping in all the dirt from the building works. They then grouted the tiles but didn’t clean the grout off the surface before putting on another two coats of sealer all of which resulted in a very poor finish.

Black Limestone Tile Showing Trapped Dirt in Wimbledon
Naturally the customer was not happy so called them back to rectify the problem and so they came back and tried to strip the sealer off with cloths and a chemical stripper. Then without rinsing the stone to remove the chemicals they added another two coats of sealer; in desperation the lady gave up with them and called me in.

Black Limestone Tile Showing Trapped Dirt in Wimbledon

Stripping the Limestone Tiled Floor

To resolve I tried all the sealant strippers available to me but couldn’t budge the mess effectively. The only other option available was to diamond grind the surface so I discussed this with the customer and she agreed to this and left me to carry on.

Initially I started with a coarse 400 grit diamond pad but even that wasn’t having much effect so in the end I had to cut back the surface using a 100 grit pad moving up to 200 grit, then 400 before finally stopping at 800. To lubricate the process you need to use a little water and then rinse away the resultant soil after each pad. If this was a polished stone surface I would have continued with finer and finer grits to restore the surface polish however these tiles were rough limestone and I needed to leave it as near to how it should be.

Black Limestone Tile Grinded with Diamond Pads in Wimbledon
Once all the Limestone had been stripped back the stone turned an uninviting grey colour, so to bring it back to black I applied two coats of Tile Doctor Stone Oil which enhanced the colour.

Black Limestone Tile Adding Stone Oil in Wimbledon

Sealing Black Limestone Tiles

I left the floor overnight to allow the Stone Oil to dry out and then returned to seal the Limestone using two coats of Tile Doctor Colour Grow which is an impregnating sealer that enhances the colour in the stone and will protect it from staining going forward.

Black Limestone Grinded and sealed in Wimbledon
When the customer saw the final result she was overwhelmed and said she felt like crying with relief, because the floor now looked how she had imagined it to be. It was a great feeling for me to know that I had solved the problems for her.

Black Limestone Before and After in Wimbledon
 

Restoring Black Limestone Tiled Floor in Wimbledon

Black Limestone Floor installation problems resolved in Wimbledon Read More »
Travertine Tiled Floor Diamond Polished in Surbiton

Travertine Tiled Floor Diamond Polished in Surbiton

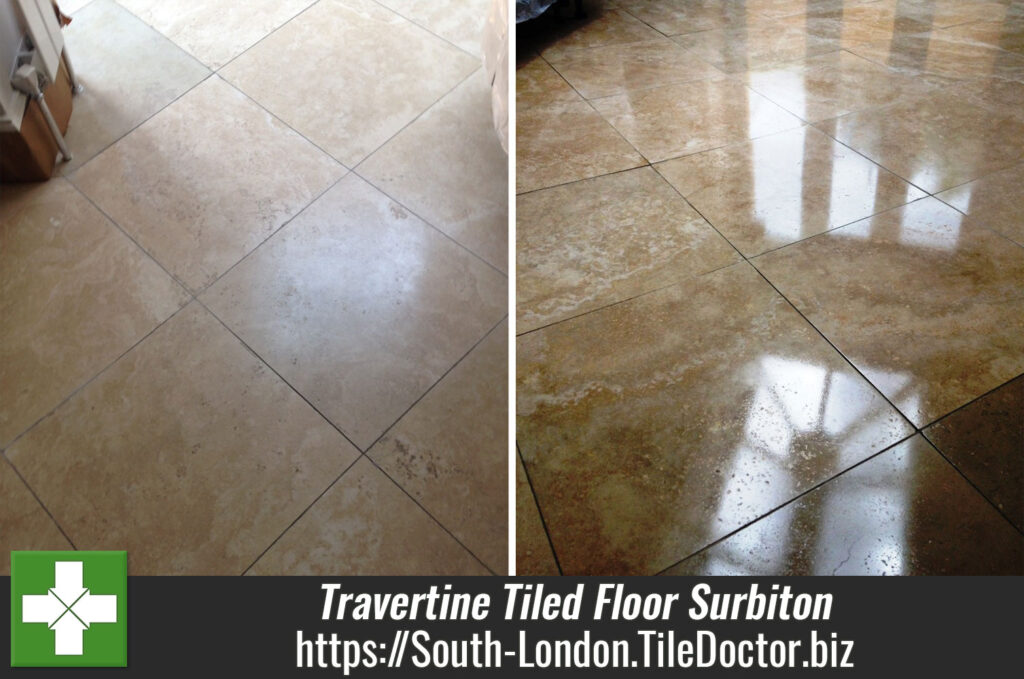
I recently carried out a clean and diamond polish of a Travertine tiled floor in Surbiton for a customer who had been fed up with the floor since she and her husband had moved in 2 years ago. The floor was the last job on their list of things to be done and they wanted to make sure that it was done properly as unfortunately in the past they have fallen prey to unscrupulous tradesmen who had not lived up to expectations.

When I was asked to quote I explained what I would do and showed pictures of previous work, and also my Trustmark Accreditation. They had also researched my work through my website and through the work history where there are lots of examples of Travertine tiles I have worked on in the past. I received the work order the next day and booked the job in for three weeks after.

Travertine Floor Surbiton Before Travertine Floor Surbiton Before Marked

Stripping and Polishing Travertine Tiles

I arrived at the agreed date and time and was pleasantly surprised to see that they had put sheeting around all of their kitchen units and skirting so all I had to protect was the wooden flooring next to the travertine.

Travertine Floor Surbiton Before Cleaning Travertine Floor Surbiton Before Cleaning

My first job was to scrub the floors Using Tile Doctor Pro Clean to get rid of any ingrained dirt and clean the grout, the soiled cleaning solution was then removed using a wet vacuum and we moved onto burnishing the stone. This is done using a rotary scrubbing machine fitted with a coarse diamond encrusted burnishing pad and a little water began to strip off the old dirt and seal from the floor, the resulting slurry was then removed using a wet vacuum. The burnishing pads come in a set of four so once we were done with the coarse pad we moved on to the Medium pad which is the first step in the polishing process.

At this point I could see more work was required to improve the grout which was done using a combination of pressurised steam, more Tile Doctor Pro-Clean and a stiff brush. Once I had removed all the dirt and old seal from the grout I went on to the next stage of polishing and used the fine pad finally moving on to the extra fine pad to give the floor that extra deep shine.

Sealing Travertine Floor Tiles

Once the floor was dry we set about sealing it using two coats of Tile Doctor Colour Grow which is a colour enhancing impregnating sealer designed to provide maximum stain protection on natural stone floors whilst bringing out the colour in the stone. After the second coat was applied I waited 10 minutes before buffing any excess residue with a white buffing pad.

Travertine Floor Surbiton After Travertine Floor Surbiton After

I offered the customer the option of creating a higher shine by applying Tile Doctor Shine Powder to give it a mirror polish but she declined as she was more than happy with the finish. Overall the floor came out really well and I found it quite a humbling experience as she was constantly saying thank you due to the fact that she had been messed about by previous contractors so was quite relieved to find someone who could actually do the job properly.

Travertine Floor Cleaned, Polished and Sealed in Surbiton

Travertine Tiled Floor Diamond Polished in Surbiton Read More »

Applying Anti Slip Treatment to Porcelain tiles in Wimbledon Office

Applying Anti Slip Treatment to Porcelain tiles in Wimbledon Office

We were contacted by a builder who had recently laid Porcelain Tiles in an office reception in Wimbledon. Although he has laid this type of tile in various art galleries around London without problem, in this particular lobby which is situated next to a shopping centre the tiles were extremely slippery and the facilities manager wanted the tiles changed at the expense of the builder.

Antislip Application Porcelain Tile Wimbledon
Obviously this would have been an expensive option and so the builder contacted Tile Doctor for help. Initially he had considered having a member of his team apply the treatment however he realised that as a Tile Doctor applicator we had been trained to apply the treatment properly and this gave the facilities manager confidence it would have been applied to the correct standard so we were awarded the work and asked to carry it out on a Sunday when the building would be empty.

Antislip Application Porcelain Tile Wimbledon

Applying the Anti-Slip Treatment

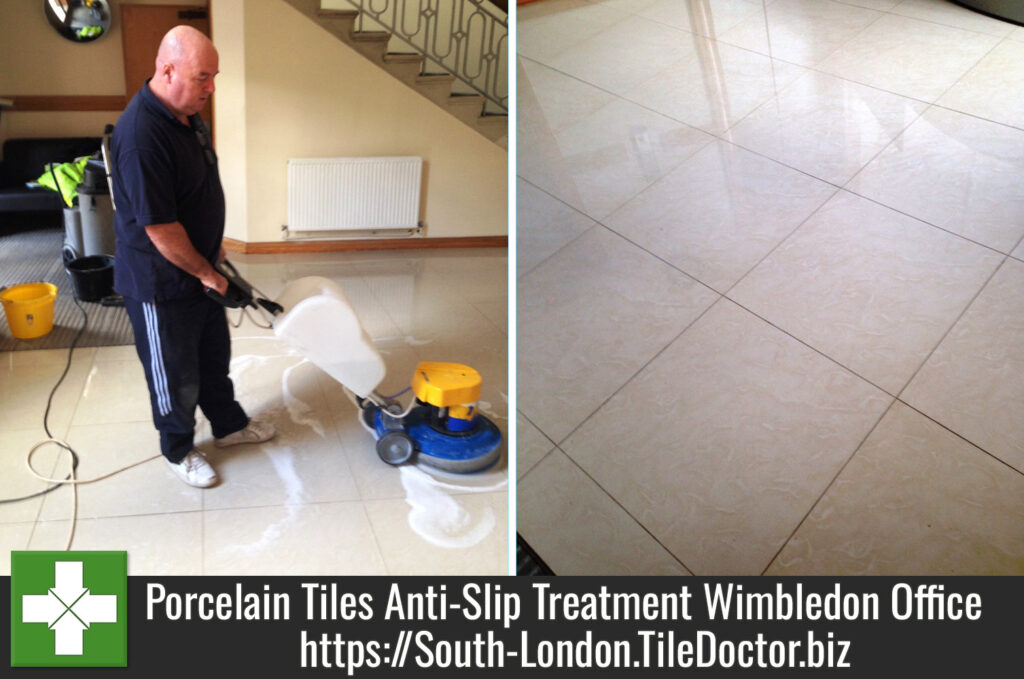
We arrived at the agreed time and were let in by the shopping centre security team. The area we were treating was around 25m2 so decided to work in 5m2 sections first cleaning the tile using the first stage Ant Slip product worked into the tile with a rotary floor machine fitted with a polypropylene brush head and then removing with a wet vacuum followed by rinsing with clean water.

We carried on with this process until the whole floor was done and let it dry before going onto the next stage to apply the Tile Doctor Anti slip (stage two) and leaving for between 3 to 5 minutes before applying the stage three which locks in the Anti Slip.

Antislip Porcelain Tile Wimbledon
The Anti Slip product is invisible to the eye however it’s very easy to test it’s been applied, all you need to do is wet the tile as the product only activates when it’s wet.

Antislip Porcelain Tile Wimbledon
When we had finished the whole floor we then tested it again just to make sure that everything worked well we cleared away all the tools making sure we left the area tidy and safe and locked the building up.

The Job took us one night and the customer is now recommending us to all other sites that have had these tiles fitted.

Preventing slips and trips on Porcelain Tile in a Wimbledon Office

Applying Anti Slip Treatment to Porcelain tiles in Wimbledon Office Read More »

Travertine Mitcham After

Travertine Tiled Kitchen floor in Mitcham

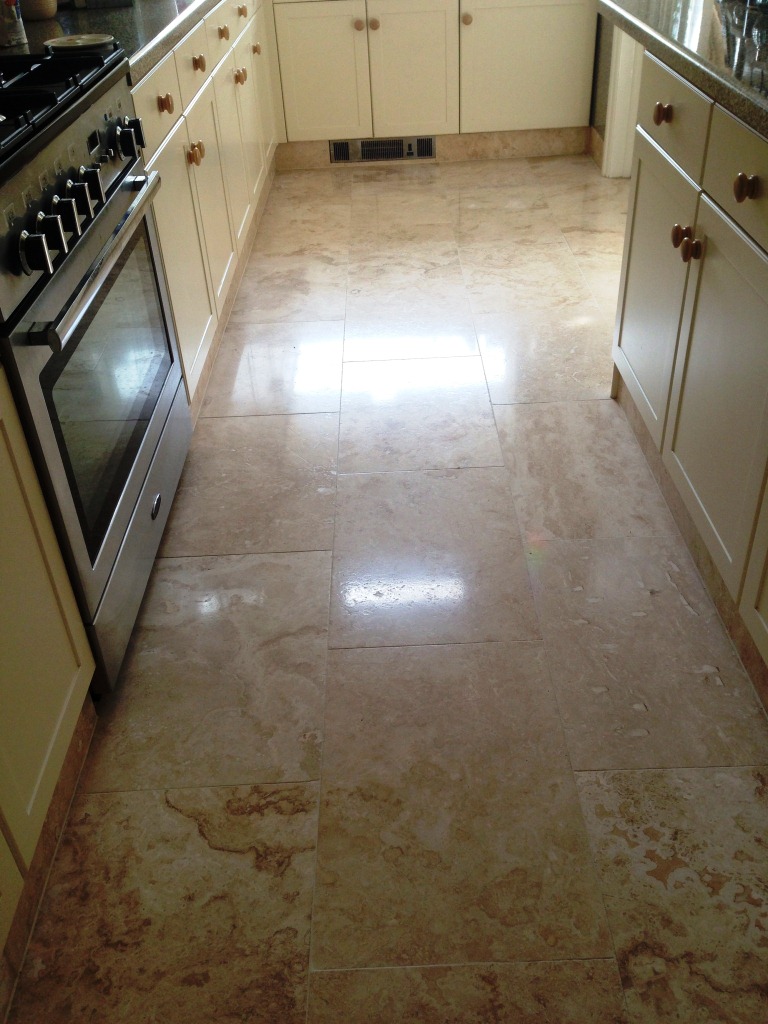
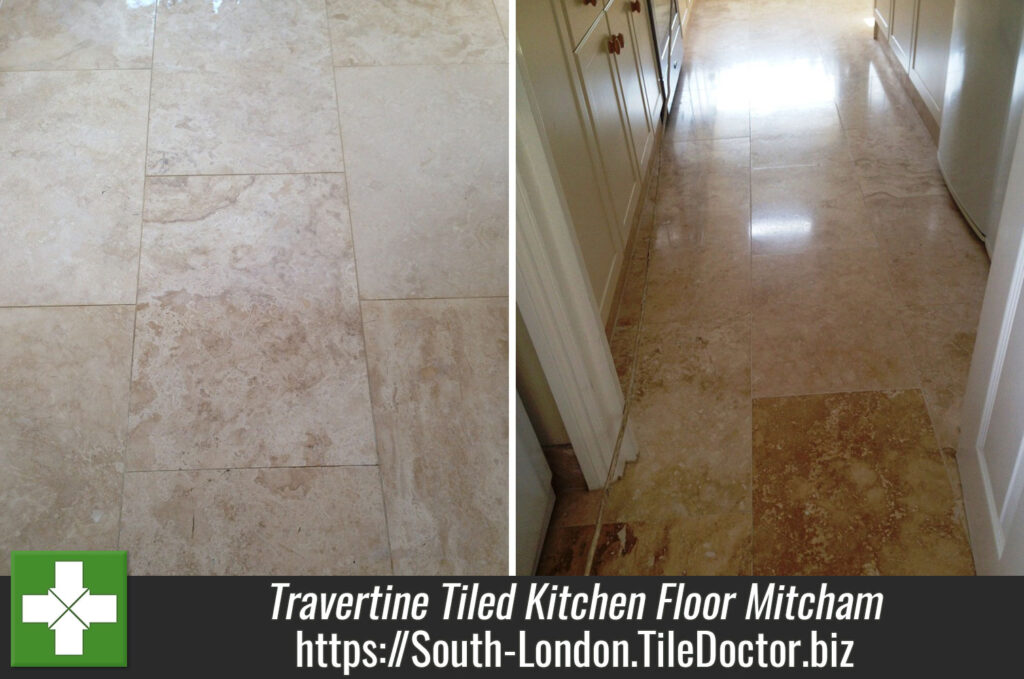
I was recently asked to visit a customer with a Travertine Tiled Kitchen floor in Mitcham South London who had spilt a strong cleaning product on the Travertine Tiles. Due to the litigious nature of the wold in which we live I can’t name the product in this post but I can tell you it’s advertised on the TV as a wonder cleaner, unfortunately acidic products like this one will eat into the sealer and with frequent use cause holes to appear in natural stone. Fearing that he had ruined them I checked the floor over and assured him I could make his tiles look as good as new.

Travertine Mitcham Before Travertine Mitcham Before

Cleaning Travertine Tile

I used the diamond encrusted burnishing pad system starting with the red pad and water to clean the tiles and remove any topical sealers that may have been present. This was continued with the white and yellow pads using nothing but water and then with a stiff grout cleaning brush and a weak solution of Tile Doctor Pro-Clean along the grout lines to make sure all the grout was thoroughly cleaned. Last step of the cleaning process was to rinse the floor of any dirt picked up by the pads and then when the floor was dry I used a green polishing pad to add a shine to the floor.

Sealing Travertine Tile

To protect the travertine it was sealed using a single coats of Tile Doctor Colour Grow which is an impregnating sealer which brings out the natural colour in stone. Once it was all dry again I buffed it up again but used a soft white buffing pad. As you can see by the photos the tiles look great and I have one very grateful customer who said they look better than when they were first laid.

Travertine Mitcham After Travertine Mitcham After


Travertine Tiled Kitchen floor in Mitcham

Travertine Tiled Kitchen floor in Mitcham Read More »

Limestone Tile After Strip and Seal

Limestone Tiled Floor Strip and Seal in Wimbledon

Details below of a Limestone tiled floor strip and seal job we did recently for a lady in Wimbledon, South West London. It was a fairly common Limestone problem which had lost its polished appearance and was looking dull.

Stripping the Limestone Tiled Floor

To resolve we had to stripped back the Limestone surface using a set of burnishing pads, these diamond encrusted pads come in a number of different colours each one does a different job from scrubbing to polishing. I started with the red pad together with water and then carried on with the white, then yellow pads using water. Finally when I had dried the floor I used a green pad to buff the floor up. This activity took most of the day so left the floor to dry overnight.

Limestone Tiled Floor in Wimbledon Limestone Tiles in Wimbledon

Sealing the Limestone Floor

The next morning I arrived to find the floor had dried out enough for me to seal it which was done using a couple of coats of Tile Doctor Colour Grow which is a great sealer for lifting the natural colours in the Limestone floor as well as providing stain protection. Once the sealer had dried I then finished it all off with a quick buff using a white buffing pad.

Limestone Tile After Strip and Seal Limestone Tile After Strip and Seal

I’m not sure the photographs really show the difference in the floor however I can tell you that when the lady returned home from work that day she was over the moon with the transformation and wrote the following testimonial:

So pleased with the service and advice received. Prompt and Professional, My floor looks like new again. Would highly recommend and use again. Thank you.


Limestone Floor Restoration in Wimbledon

Limestone Tiled Floor Strip and Seal in Wimbledon Read More »

=================================

South London Tile Doctor

================================= Read More »
Scroll to Top