Caterham Tile Cleaning

Caterham Tile Cleaning

Welcome to my Work History archive where you will find examples of the cleaning and renovation of tiles carried out in Caterham.

Terrazzo Tiled Flooring Restored at a Church in Redhill

Terrazzo Tiled Flooring Restored at a Church in Redhill

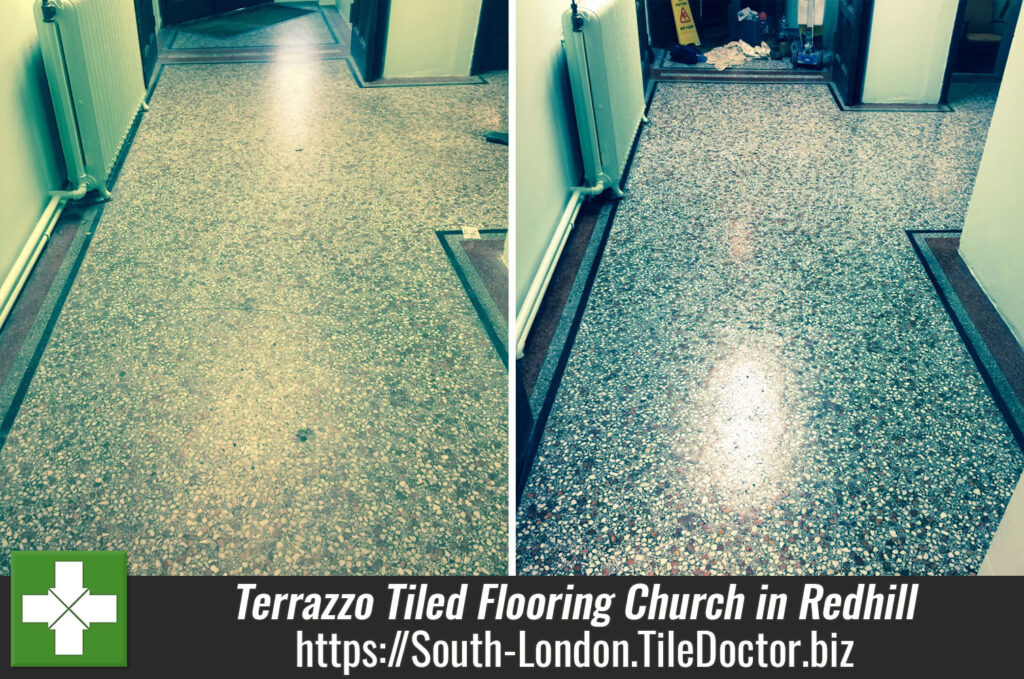
Every so often I will get the chance to undertake tiled flooring restoration work in public buildings, and late last year I was asked to clean and seal a Terrazzo floor at a church in Redhill. The floor wasn’t in great condition; not only was it suffering from a significant amount of dirt due to a lack of proper maintenance, but it was also marked by several cracks. Overall, the appearance of the floor was very displeasing and the church was keen to have me in to complete some repairs, along with a deep clean and seal.

Terrazzo Flooring Redhill Church Before Restoration Terrazzo Flooring Redhill Church During Crack Repair

Cleaning and Burnishing a Terrazzo tiled floor

Upon initial inspection of the floor, I was unable to say for certain whether there was any old sealer remaining on the tiles so to ensure it was removed I began the cleaning process by applying a layer of Tile Doctor Remove & Go, which is a powerful cleaner/stripper designed to both break down old layers of sealant and lift out any ingrained dirt.

I then gave the floor a rinse with water to remove any excess cleaning product, before moving onto a different cleaning process, known as burnishing. Burnishing involves polishing the surface with to achieve an aesthetically pleasing sheen finish. The Tile Doctor burnishing system consists of four diamond encrusted burnishing pads with different levels of grit.

Terrazzo Flooring Redhill Church Part Cleaned Terrazzo Flooring Redhill Church Part Cleaned

I began by applying a Coarse burnishing pad, before working my way through the system with Medium, Fine and finally Very Fine pads to achieve a very refined, high quality polished finish, you need to use a little water to help lubricate the burnishing and you need to rinse the floor after each pad to remove the slurry.

Terrazzo Flooring Redhill Church Cleaning in Progress Terrazzo Flooring Redhill Church During Burnishing

Once the floor had been allowed to dry completely following both cleaning processes, I set about filling the cracks in the tiles with two part resin stone filler.

Terrazzo Flooring Redhill Church During Crack Repair Terrazzo Flooring Redhill Church Crack Filled

Then, once the filler had dried, I re-polished the floor using only the extra fine burnishing pad, focusing my attention along the crack lines. This really helped to reduce the evidence of cracks and left instead a smoothed surface.

Sealing a Terrazzo tiled floor

The final stage of the restoration involved sealing the Terrazzo tiles with Colour Grow, which is Tile Doctor’s colour intensifying sealer that impregnates the stone seeping into its pores to provide protecting the floor from within with a robust seal capable of withstanding the high amount of traffic experienced by church floors. The last step was to buff the entire area with a soft white buffing pad.

Terrazzo Flooring Redhill Church After Terrazzo Flooring Redhill Church After

The church was very pleased with the results, especially that they were able to show it off for last year’s Remembrance Sunday and left the following comment on the Tile Doctor feedback system:

“Many thanks for the work on our Terrazzo floors. It’s only when you see the before and after that you realise how grubby they had become. We have had loads of complimentary comments as to how good they look. Bill Bailey was a very personable and professional contractor who put himself out to work around our requirements and others working in the buildings at the same time. More than happy to recommend the company and Bill personally. Many thanks for a job well done.”

Terrazzo Flooring Redhill Church Before and After Restoration
 

Professional Restoration of a Cracked Terrazzo Church Floor in Surrey

Terrazzo Tiled Flooring Restored at a Church in Redhill Read More »

Terracotta Tile after cleaning and sealing

Terracotta Tiled Floor Sealing

We were consulted on this Terracotta Tiled floor because the owner complained that whenever she cleaned and sealed them they always got dirty quickly. I asked how many coats of seal was used on the floor and as it turns out only two coats were used because that was the instructions on the bottle. I suspect the bottle hadn’t listed Terracotta specifically and I informed the owner that with this type of floor the minimum amount of coats would be seven, she was very surprised by this but the fact is Terracotta is very porous.

Cleaning Terracotta Tile

I started the job using a strong solution of Tile Doctor Pro-Clean, which is a heavy duty alkaline product ideal for cleaning tiles, scrubbed in with a black pad fitted to a rotary machine. I had to repeat this about five times and also used a steamer to clean out the grout lines and any bits left on the tiles, once this was done I thoroughly rinsed the floor to remove any remaining chemical and left it to dry overnight.

Terracotta Tile Before Cleaning

Sealing Terracotta Tile

I left the floor to dry overnight and the next day came back to do the sealing. There were a couple of spots that needed further attention which were tackled using the steamer which has the added advantage to neutralising the floor and evaporating leaving the floor dry again. Tile Doctor Seal and Go was used to seal the floor, it’s a water based sealer so it doesn’t give off an odour when it’s drying and also offers durable stain protection together with a low sheen finish. In the end the floor actually took nine coats of sealer before it was fully sealed, which naturally took a long time to apply as you have to wait for it to dry before applying the next coat.

Terracotta Tile after cleaning and sealing
The lady was extremely happy and said it turned out exactly as she had always wanted it to.

Terracotta Floor Cleaned and Sealed in Surrey

Terracotta Tiled Floor Sealing Read More »

Ceramic Tile and Grout After

Soot damaged Grout cleaned and re-coloured in Warlingham

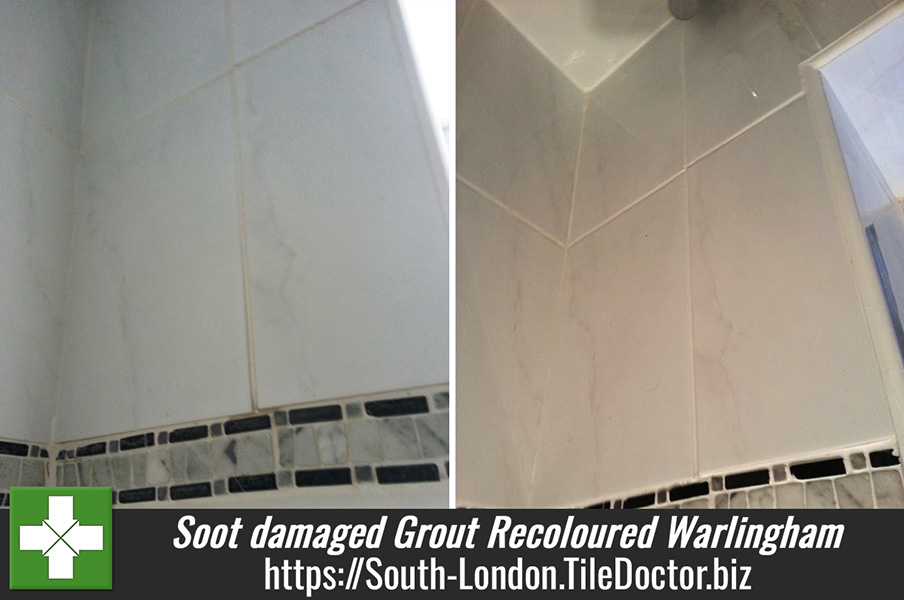
This job was completed to resolve an Insurance claim for a lady who lives in Warlingham whose bathroom tiles and grout had been damaged from smoke and soot. A building company had attempted to clean the tiles however the lady was not satisfied and told the insurance company it was to be done properly. On inspection the grout was still a bit dirty but I told her it was possible to clean it up, but could not guarantee it would be a uniform finish. I suggested that she could have the grout re-coloured at the same cost and gave her a small demonstration, she was happy with this and contacted the insurance company to get the go ahead; a week later she called me to book it in.

Ceramic Tile and Grout Before Ceramic Tile and Grout Before

Preparing the Tile and Grout for Re-colouring

When I started the job I went over it with the lady to make sure she was happy with the colour and if there were any other issues. She pointed out that on the border tiles had discoloured and on closer inspection I found that they were a marble tile and the builders had put a topcoat seal on them to make them shiny but because it was the wrong type of seal and it had started to peel.

As a result it was necessary to the sealer as so I put a coat of remove and go on the border tiles and left it to dwell; I also sprayed a solution of Tile Doctor Pro-Clean onto the ceramic wall tiles and scrubbed the tiles and grout before washing then down with warm water. By this time I could then scrub the border tiles in order to remove the old topcoat sealer. I dried the border tiles using my heat gun and the applied a coat of Ultra-Seal; the marble tiles had to be sealed before I could colour the grout.

Applying Grout Colourant

Once everything had been rinsed and the grout had dried I was able to apply the grout colourant using my colour applicator (toothbrush). Its meticulous work so it took a couple of hours to apply and by then I could go round to remove any excess colourant by spraying plain water and scrubbing with a white pad. I use a white pad, because if I used a coloured pad I could transfer the dye from the coloured pad to the seal.

Ceramic Tile and Grout After Ceramic Tile and Grout After

Once I had completed the whole room I checked to make sure everything was okay and found I needed to touch up a couple of areas. I then buffed all the tiles up and cleaned the bath, sink and floor and asked the lady to check it all before putting all my equipment and dust sheets back into the van. The lady was really happy with the result (see comment below) and has asked me to do the same work in her kitchen.

Bill worked continually throughout the day without a break. He was very polite and courteous He was full of knowledge and yes I would use again.

Kim Dehnert, Wallingham


Grout restoration in Warlingham

Soot damaged Grout cleaned and re-coloured in Warlingham Read More »

Shower Grout Cleaning Caterham After

Tiled Shower Clean and Seal in Caterham

Shower problems must be the most common problem we come across at Tile Doctor where we often here of issues with discoloured shower tile and grout usually combined with a build up of mould. Discolouration problems tend to come from the dyes in bathroom products such as body washes and shampoo, where as mould is due to inadequate ventilation or extraction magnified by our cold damp climate as we keep the windows shut and increase insulation to reduce drafts and keep warm.

Removing Mould and Discolouration from Shower Grout

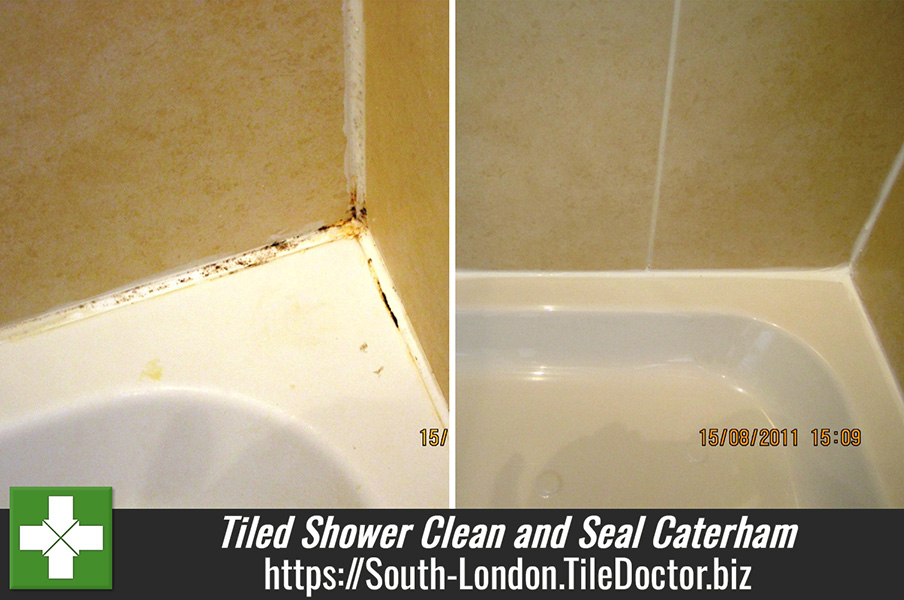
The photographs shown on this page come from a ceramic tiled shower cubicle in the Surrey town of Caterham which you may have heard of as it’s where they make the Caterham Sports Car. You should be able to see from the photographs areas of discoloration and mould on the grout and silicone sealant which unlike the glazed ceramic tiles are slightly porous and have allowed the dyes and mould to taken a hold.

Shower Grout Cleaning Caterham Before Shower Grout Cleaning Caterham Before
Shower Grout Cleaning Caterham Before

To resolve the problems with the tile and grout a strong solution of Tile Doctor Pro-Clean was mixed in a spray bottle and then sprayed on; mixing the product with air allows it to stick better onto the vertical surface otherwise gravity causes it to run off. The Pro-Clean was allowed to dwell onto the surface for a few minutes before being worked in with a grout brush. The next step was to rinse the Pro-Clean down and then re-apply the process to areas which we had missed or needed further attention.

The tile was then left to dry before replacing the silicone sealant between the tile and shower tray; whilst Tile and Grout can normally be treated once mould gets a hold on the silicone the only thing you can do is to replace it. In some cases I’ve come across the grout becomes too stained to treat and in that case the only thing you can do is scrape the top layer of grout back using a screwdriver head sized to fit into the grout line.

Shower Grout Sealing

The last step was to seal the grout for which we used Tile Doctor Pro-Seal which is a penetrating sealer rather than one that sits in the surface. The sealer should prefect staining in future however given the location it will need to be re-applied more frequently than usual.

Shower Grout Cleaning Caterham After Shower Grout Cleaning Caterham After
Shower Grout Cleaning Caterham After


Shower Tile Cleaning in Caterham, Surrey

Tiled Shower Clean and Seal in Caterham Read More »

=================================

South London Tile Doctor

================================= Read More »

Scroll to Top