Work by Category

South-London-Tile-Doctor

Welcome to my Work History archive where you will find detailed examples of Tile, Grout and Stone Cleaning and Renovation work carried out through South-London.

To make things easier to find I have organised the posts by the most popular types of Tile and Stone. I also renovate other materials so if you’re looking for something else do get in touch as it’s highly likely we have the solution.

Popular requests include Ceramic Tile, Encaustic Cement, Fireplaces, Flagstone Pavers, Grout Cleaning, Limestone, Marble, Porcelain Tile, Quarry Tile, Sandstone, Slate, Terracotta Tile, Terrazzo Floors, Travertine, Victorian Flooring and Vinyl Floors.

Travertine Mitcham After

Travertine Tiled Kitchen floor in Mitcham

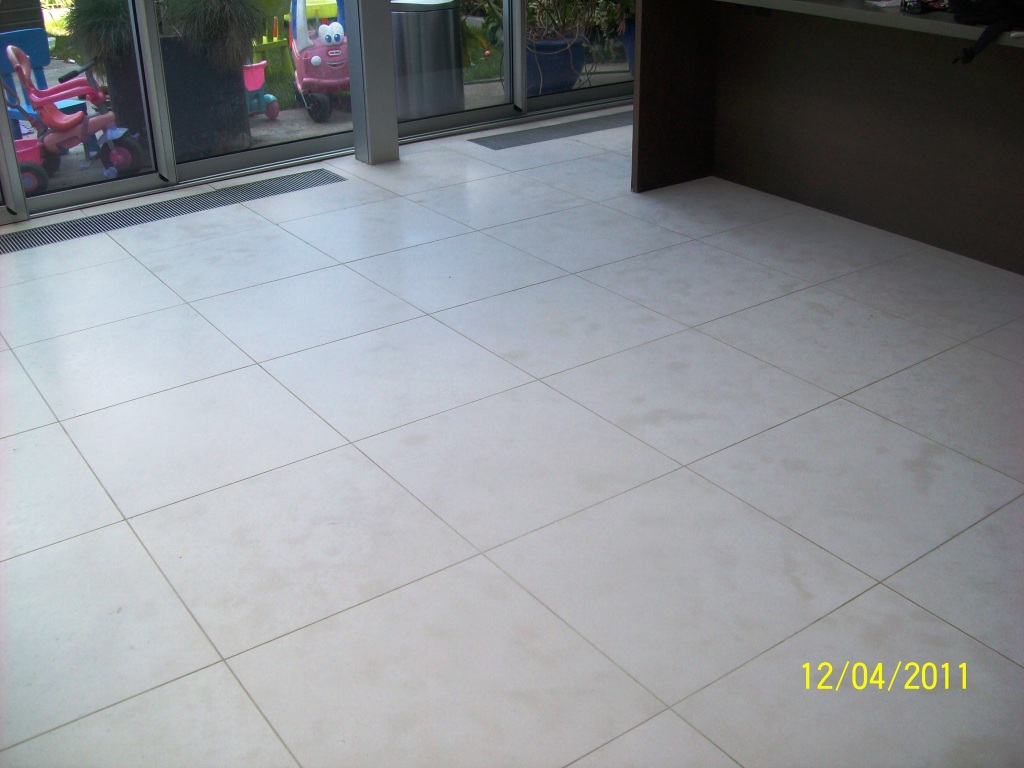
I was recently asked to visit a customer with a Travertine Tiled Kitchen floor in Mitcham South London who had spilt a strong cleaning product on the Travertine Tiles. Due to the litigious nature of the wold in which we live I can’t name the product in this post but I can tell you it’s advertised on the TV as a wonder cleaner, unfortunately acidic products like this one will eat into the sealer and with frequent use cause holes to appear in natural stone. Fearing that he had ruined them I checked the floor over and assured him I could make his tiles look as good as new.

Travertine Mitcham Before Travertine Mitcham Before

Cleaning Travertine Tile

I used the diamond encrusted burnishing pad system starting with the red pad and water to clean the tiles and remove any topical sealers that may have been present. This was continued with the white and yellow pads using nothing but water and then with a stiff grout cleaning brush and a weak solution of Tile Doctor Pro-Clean along the grout lines to make sure all the grout was thoroughly cleaned. Last step of the cleaning process was to rinse the floor of any dirt picked up by the pads and then when the floor was dry I used a green polishing pad to add a shine to the floor.

Sealing Travertine Tile

To protect the travertine it was sealed using a single coats of Tile Doctor Colour Grow which is an impregnating sealer which brings out the natural colour in stone. Once it was all dry again I buffed it up again but used a soft white buffing pad. As you can see by the photos the tiles look great and I have one very grateful customer who said they look better than when they were first laid.

Travertine Mitcham After Travertine Mitcham After


Travertine Tiled Kitchen floor in Mitcham

Travertine Tiled Kitchen floor in Mitcham Read More »

Encaustic Floor Tiles After Cleaning

Cleaning Encaustic Kitchen Floor Tiles in Beckenham

On a visit to a customer to a customer in Beckenham, Kent who had a pair of rugs that needed cleaning I was asked to take a look at her Encaustic kitchen floor tiles which had become dull and she couldn’t keep them clean. I carried out a demonstration on how I would clean them and also explained the different sealer options available and how each sealer can have a different effect. She was pleased with the demonstration and engaged me to clean the tiles as well as the rugs specifying a sealer that would leave a sheen on the tile.

Encaustic Floor Tiles Before Cleaning

Cleaning black Porcelain floor tiles

I set about scrubbing the floor using a hot water dilution of Tile Doctor Pro-Clean Tile and Grout cleaner combined 50:50 with NanoTech UltraClean which adds tiny abrasive particles to the solution to make a more effective cleaning product. The solution was worked into the tiles by scrubbing with a rotary machine fitted with a black scrubbing pad and a stiff hand brush was used along the tight grout lines. The soiled solution was removed using a wet vacuum and floor thoroughly rinsed down with clean water. The tiles were then left to dry with the aid of a Turbo Air blower to help speed up the drying time.

Encaustic Floor Tiles Before Cleaning Encaustic Floor Tiles Before Cleaning

Sealing Encaustic Floor Tiles

Once the tiles were dry I applied five coats of Tile Doctor Seal and Go which is a water based protective sealer that doesn’t give off any odour and produces a nice low sheen the customer was looking for.

Encaustic Floor Tiles After Cleaning
The final result was one happy customer with a clean easy to maintain tiled floor and two clean rugs as well.

Cleaning Encaustic floor Tiles in a Beckenham Kitchen

Cleaning Encaustic Kitchen Floor Tiles in Beckenham Read More »

Travertine Floor Mid Clean

Travertine Tiled floor in Gerrards Cross

I had a phone call a few weeks ago from a lady in Gerrards Cross to come and clean her large Travertine tiled floors prior to her renting out a property. I had actually carried out this job for her four years ago and she was really pleased with the service we provided and had therefore asked me come back. Thinking back four years is a long time between floor polishes so we certainly did a good job on the floor the first time.

Travertine Floor Before Travertine Floor Before

Maintaining Travertine Tiles

Travertine is a very hard stone which required the surface to be cut back before polishing, to do this we make use of a diamond encrusted burnishing pad system which is supplied in a set of four pads each one having a different purpose. We started with a Red pad first together with a little water and this strips dirt and old sealers from the floor, this is followed with the White, Yellow and finally Green pad which doesn’t required the use of any water. As you progress through the pads you find the polish is restored and you get a deep shine in the surface of the tile.

Travertine Floor Mid-Clean Travertine Floor Mid-Clean

Sealing Travertine Tile

To protect the floor from stains it was sealed with a single coat of Tile Doctor Colour Grow which is a colour enhancing sealer that brings out the colours in natural stone. Once the sealer was dry it was buffed using a white buffing pad to make sure that I hadn’t left any residues from the seal.

Once again the lady was really pleased with our work and promised to call the next time the property was to be let out again, but next time she wants me to do the carpets and the patio areas as well.

Travertine Floor After Travertine Floor After


Travertine tiled floor maintained in Gerrards Cross

Travertine Tiled floor in Gerrards Cross Read More »

Quarry Tile Kitchen Floor Before and After

Quarry Tiled Hallway Floor Cleaned and Sealed in Brixton

These photographs are from a Quarry Tile Cleaning job we did for a lady in Brixton recently, as you can see from the early pictures they were not only dirty but there was also evidence of an old sealer and splashes of paint on them as well both of which would have to be removed first.

Quarry Tile Kitchen Floor Before Quarry Tile Kitchen Floor Before

Cleaning Hallway Quarry Tiles

The first task we did on arrival was to disconnect her cooker and washing machine which were placed outside in the garden, this would allow us to get at all the tiled areas and also meant there was less to protect.

Working in small sections the next step was to pre-wet the floor tiles followed by adding a dilution of Tile Doctor Remove and Go combined 50/50 with Nanotech UltraClean, these two products combine to make a powerful cleaner/stripper that’s safe to use on tile. The cleaning solution was left to soak into the tile whilst we set up all of our equipment and added protective coverings to the kitchen units, walls and adjoining floors.

After about forty five minutes we re-wet the areas and hand scrubbed the tiles using scouring pads. This process was repeated covering small areas at a time until the kitchen was finished. We then used our scrubbing machine with a medium brush head fitted and thoroughly rinsed the floor to remove any trace of chemical.

We needed the floor dry for sealing so a couple of Turbo blowers we setup to force dry the floor and this took a couple of hours before my moisture meter told me that the floor was dry enough.

Sealing Hallway Quarry Tiles

After discussing sealer choices with the customer it was decided to seal the floor with Tile Doctor Colour Grow which provides a natural finish whilst lifting the natural colours in the tile. Two coats were sufficient and once it had dried we refitted the cooker and washing machine, put all the plinths back and removed all of our protective coverings.

Quarry Tile Kitchen Floor After Quarry Tile Kitchen Floor After

The lady was really pleased with our work and left the following testimonial.

“Bill did a fantastic job on my kitchen floor, I can’t thank him enough. Mrs Scott, Brixton”

Quarry Tile Kitchen Floor Before and After
 

Quarry Tile Renovation in Brixton

Quarry Tiled Hallway Floor Cleaned and Sealed in Brixton Read More »

Dirty Travertine Sealed

Kitchen Travertine Tiled floor cleaning in Mortlake

We recently cleaned and sealed a small Travertine floor in a kitchen for a customer in Mortlake near Richmond upon Thames in Surrey. To be fair the floor wasn’t that bad, it was just a bit dirty because the customer had been told to use a steamer to clean the floor which was bad advice as the heat from the steam was breaking down the sealer and resulting in the tiles getting dirty.

Dirty Travertine Before Dirty Travertine Before

Cleaning Travertine Kitchen Tile

I first applied a 50/50 mix of Tile Doctor Pro-Clean and Nanotech Ultra Clean leaving it to dwell on the tile for 15 minutes before scrubbing it in with a rotary Machine fitted with a brush head. Once I was satisfied the floor was clean it was thoroughly rinsed with clean water. The dirty solution removed using a wet vacuum and then left it to dry overnight.

Dirty Travertine Cleaned not Sealed Dirty Travertine Cleaned not Sealed

Sealing Travertine Tile

The next day the floor had dried and we proceeded to seal it using two coats of Tile Doctor Colour Grow which as well as providing a good level of stain protection also brings out the natural colours in the stone. I always use a water test to determine if the right about of sealer has been applied, very simply you drop a small amount of water onto the stone and if it forms a bubble on the surface it’s sealed.

Dirty Travertine Sealed Dirty Travertine Sealed

Before I left I provided the customer with a proper maintenance plan for the floor, and expect a call in around a years’ time to come and do a deep clean and seal. The customer was delighted with the results and said the floor looked better than when they had it laid.

Resolving Travertine steam cleaning problems in Surrey

Kitchen Travertine Tiled floor cleaning in Mortlake Read More »

Terracotta Restoration Before and After

Terracotta Tiled Floor Sealing

Although officially the East Surrey Tile Doctor we often get requests further afield through customer recommendations, this particular Terracotta Tiled floor was in Brixton, South London. You can see from the photographs below that the floor was not looking its best and had been splashed with paint.

Terracotta Tile Cleaning

To get the tiles clean we applied a strong dilution of Tile Doctor Pro-Clean mixed 50/50 with NanoTech Ultra Clean which combines well to produce a heavy duty alkaline cleaner/coatings stripper with a cleaner containing tiny nano sized abrasive particles that work deep into the floor. This combination is ideal for dealing difficult floors, its best to let it dwell on the floor for 10 to 20 minutes before working it into the tiles with a rotary machine fitted with a black scrubbing pad.

Terracotta Restoration Before Photo
Once that was done the soiled solution was removed from the floor using a wet vacuum and we were then able to see a few spots where old wax remained on the floor. To deal with the wax Tile Doctor Remove and Go, which is a powerful coatings remover, was applied to the floor and left to dwell for a while before rinsing thoroughly with clean water and then treated with a steam cleaning machine to ensure the floor had been neutralised of all chemicals. It’s important not to leave a trace of chemical on the floor as they could react with the sealer.

The floor was still quite wet at this stage with small puddles of water forming in the dips of the uneven floor; the wet vacuum took care of most of this but the floor was still too damp for sealing so I left a couple of air blowers to assist with the drying of the floor and returned two days later to start the sealing.

Terracotta Restoration Before Photo

Terracotta Tile Sealing

When we returned the floor was mainly dry but there were a couple of damp spots which I took care of with a heat gun. Tile Doctor Seal and Go was used to seal the floor; Terracotta can be very porous so eight coats were required to completely seal the floor so it was some time before it was finished.

Terracotta Restoration After Photo Terracotta Restoration After Photo

When I finished I gave the customer instructions on how to maintain the floor. He was over the moon with the result and said that it had far exceeded his expectations.

Another happy customer.

Terracotta Restoration Before and After
 

Terracotta Floor Cleaned and Sealed in Brixton

Terracotta Tiled Floor Sealing Read More »

Victorian Floor After Cleaning

Victorian Tiled Hallway Cleaning in Richmond

This hallway floor was at a property in the London borough of Richmond which had just been sold and the new owner wanted the Victorian tiled floor cleaning before she moved in.

Victorian Floor Cleaning Before

Cleaning a Victorian Floor

To clean the floor I applied a 50/50 mix of Tile Doctor Pro-Clean and NanoTech Ultra Clean diluted with water. Pro-Clean is a strong alkaline cleaner so it won’t damage the tile like some acidic cleaners and NanoTech Ultra Clean adds tiny abrasive particles to the solution that can help penetrate into the tile to lift out the dirt. This was left to dwell and soak into the floor for a while before being agitated using a rotary machine fitted with a black scrubbing pad. This worked to clean the floor and strip any remaining sealer from the tile; the soiled solution was removed from the floor using a wet vacuum and then thoroughly rinsed to remove any cleaning products before sealing and neutralise the floor.

Victorian Floor Cleaning During

Sealing a Victorian Floor Sealing

The floor was dried using an floor blower, which is a like an industrial hair dryer, before being sealed with five coats of Tile Doctor Seal and Go which is an ideal sealer for Victorian tiled floors as it leaves a low sheen finish whilst providing excellent stain protection. You have to wait for each coat to dry before moving on to the next so it was a long day, fortunately the house was empty which made the job easier.

Victorian Floor After Cleaning
 

Victorian Tiled hallway floor cleaned and sealed in Richmond

Victorian Tiled Hallway Cleaning in Richmond Read More »

Quarry Tiled Floor in Wallington

Quarry Tiled Hallway Floor Cleaned and Sealed in Wallington

The owner of this house wanted her hallway quarry tiles renovating, someone had varnished them around 15 years previously and were now overdue a good clean and seal.

Cleaning Hallway Quarry Tiles

The first step was to scrub in a dilution of Tile Doctor Pro-Clean with a rotary machine fitted with a black scrubbing pad. However this only managed to remove some of the varnish and so I next applied Tile Doctor Remove and Go which is a much stronger product designed for stripping coatings from floors. The process I used was to apply Remove and Go in sections leaving it to dwell for a hour and then scrubbing it with a brush. I rinsed the floor down to reveal a few stubborn spots that needed some further work and then washed the floor down again before leaving it for the evening to dry.

Quarry Tiled Floor in Wallington

Sealing Hallway Quarry Tiles

We returned the next day and began to seal the floor using six coats of Tile Doctor Seal and Go which leaves a nice deep low sheen on the tile surface as well as providing stain protection. The owner was extremely happy with the result and left the feedback below.

“Very professional, worked continuously. A joy to have 2 men working in the house who conversed quietly with no unpleasant language! A superb job done on our (more than 100 year old) quarry tile floor.”

Mrs Quested, Wallingon


Quarry Tile Renovation in Wallington

Quarry Tiled Hallway Floor Cleaned and Sealed in Wallington Read More »

Marble Tiled Hallway Farnborough

Marble Tiled Hallway Cleaned and Polished in Farnborough

It’s not our local area but following a recommendation to this client by another customer we were asked to have clean and seal these Marble tiles in the hallway of a house in Farnborough.

Marble Tile Cleaning and Polishing

There was no sealer present on the Marble tiled floor so gave the floor a clean with a dilution of Tile Doctor Pro-Clean which is safe to use on stone floors, Pro-Clean is also very effective on grout so we took the opportunity to get into the grout lines as well. Once we were happy with the tile and grout we removed the soiled cleaning solution using a wet vacuum and washed the floor down with clean water.

The next step was to use a set of diamond encrusted burnishing Pads fitted to a rotary buffing machine to polish the floor. The pads come in a set and are very effective at restoring the shine back on Marble, Limestone and Travertine etc.

Marble Tiled Hallway Farnborough

Sealing Marble Tiles

Once the floor was polished we applied two coats of Tile Doctor Ultra-Seal which provides a high level of surface protection whilst maintaining the natural look of the Marble tiles. Once the sealer had dried we buffed the floor again using a white polishing pad.

Marble Tiled Hallway Farnborough2
I’m, afraid I forgot to take any photographs before we started cleaning so you can see the difference we made to the floor, needless to say however the customer was very happy with the results

Marble Floor Tiles and Grout Refreshed in Farnborough

Marble Tiled Hallway Cleaned and Polished in Farnborough Read More »

Cleaning Porcelain Car Showroom Weybridge Before

Porcelain tile cleaning in a Car Showroom, Weybridge

We were asked to visit a prestige car showroom near Weybridge in surrey to see what could be done to improve the appearance of the Porcelain Tiles in the showroom. As well as foot traffic the floor also had to cope with the rubber from car tyres; naturally they had been cleaning the floor regularly themselves but were not happy with the results.

Cleaning Car Showroom Weybridge Before

Cleaning Porcelain Tiles

Porcelain is quite a durable material that likes ceramics don’t usually need a sealer so we prescribed a Deep Clean was in order and set about scrubbing the floor using Tile Doctor Pro-Clean which is a strong alkaline cleaning product specially designed for use on Tile, Stone and Grout where acidic cleaners can cause damage. The solution was scrubbed in using a rotary machine fitted with a black scrubbing pad and then thoroughly rinsed down. I should point out a wet vacuum machine comes in very handy here for removing the liquids from the floor. When it had dried I buffed it up using a white buffing pad.

It’s difficult to see the improvement from the photographs but I can tell you the owner was really pleased with the result as were some customers who came in when we were finishing up.

Cleaning Porcelain Car Showroom Weybridge After
 

Cleaning Porcelain tiles at a prestige car showroom in Weybridge

Porcelain tile cleaning in a Car Showroom, Weybridge Read More »

Quarry Tile Cleaning After

Quarry Tiled Kitchen Floor Cleaned in Leatherhead

Details below of a Quarry Tiled kitchen floor that were cleaned and sealed for a lady in Leatherhead. As you can see it was quite a large area and the quarry tiles were looking dull and tired, there was some staining to the grout.

Quarry Tile Cleaning Before

Cleaning Kitchen Quarry Tiles

A solution of Tile Doctor Pro-Clean was applied to the floor and left to soak for a short while before being scrubbed in with a rotary machine fitted with a black scrubbing pad. The grout also need attention, unfortunately we don’t have a machine that will get into the grout lines so this had to be manually scrubbed by hand using a grout brush, which as you can imagine took some time to do. The soiled cleaning solution was then removed using a wet vacuum and the floor thoroughly rinsed with water and then left to dry overnight.

Quarry Tile Cleaning Before Zoom Quarry Tile Cleaning After Zoom

Sealing Kitchen Quarry Tiles

When we returned the next day we could see there were some grout lines that we had missed the day before so we set about cleaning those up. Once we were happy with the floor it and it had managed to dry off we sealed the floor using six coats of Tile Doctor Seal and Go which provides surface stain protection to the quarry tile and grout and also leaves a nice deep low sheen on the tile surface. The lady was over the moon with the results and her husband was even happier because it meant he didn’t have to pay out for a new kitchen.

Quarry Tile Cleaning After
 

Cleaning a Quarry Tiled Kitchen Floor in Leatherhead

Quarry Tiled Kitchen Floor Cleaned in Leatherhead Read More »

Leatherhead Quarry Tiles after restoration

Quarry Tile Floor Restoration at a School in Leatherhead

This Quarry Tile floor was found under carpeting at a school in Leatherhead, Surrey during a refurbishment; you can see from the photograph what a terrible state it was in however the school was keen to keep the tiles and we were brought in to restore them.

Leatherhead Quarry Tiles before restoration

Cleaning Quarry Tiles

There was a lot of dirt on the tiles so a strong solution of Tile Doctor Pro-Clean was applied to the floor and left to soak in for around 20 minutes; Pro-Clean is a multipurpose alkaline cleaning product designed specifically for cleaning tile and stone. The floor was then scrubbed using a rotary machine fitted with a black scrubbing pad and then thoroughly rinsed with water which was removed using a wet vacuum. Once the Quarry tiles were dry it was possible to spot the areas in need of further attention and these were scrubbed by hand together with more Pro-Clean.

Sealing Quarry Tiles

Once happy with the floor it was left to dry off overnight and we came back the next day to seal it with six coats of Tile Doctor Seal and Go which will provide future surface stain protection and also leaves a nice deep low sheen. The builders working on the refurbishment couldn’t believe the finish, I must admit looking at the photographs it was quite a transformation.

Leatherhead Quarry Tiles after restoration
 

Cleaning a Quarry Tiled floor at a Leatherhead School

Quarry Tile Floor Restoration at a School in Leatherhead Read More »

Terracotta Tile after cleaning and sealing

Terracotta Tiled Floor Sealing

We were consulted on this Terracotta Tiled floor because the owner complained that whenever she cleaned and sealed them they always got dirty quickly. I asked how many coats of seal was used on the floor and as it turns out only two coats were used because that was the instructions on the bottle. I suspect the bottle hadn’t listed Terracotta specifically and I informed the owner that with this type of floor the minimum amount of coats would be seven, she was very surprised by this but the fact is Terracotta is very porous.

Cleaning Terracotta Tile

I started the job using a strong solution of Tile Doctor Pro-Clean, which is a heavy duty alkaline product ideal for cleaning tiles, scrubbed in with a black pad fitted to a rotary machine. I had to repeat this about five times and also used a steamer to clean out the grout lines and any bits left on the tiles, once this was done I thoroughly rinsed the floor to remove any remaining chemical and left it to dry overnight.

Terracotta Tile Before Cleaning

Sealing Terracotta Tile

I left the floor to dry overnight and the next day came back to do the sealing. There were a couple of spots that needed further attention which were tackled using the steamer which has the added advantage to neutralising the floor and evaporating leaving the floor dry again. Tile Doctor Seal and Go was used to seal the floor, it’s a water based sealer so it doesn’t give off an odour when it’s drying and also offers durable stain protection together with a low sheen finish. In the end the floor actually took nine coats of sealer before it was fully sealed, which naturally took a long time to apply as you have to wait for it to dry before applying the next coat.

Terracotta Tile after cleaning and sealing
The lady was extremely happy and said it turned out exactly as she had always wanted it to.

Terracotta Floor Cleaned and Sealed in Surrey

Terracotta Tiled Floor Sealing Read More »

Limestone Floor After

Limestone Tiled Floor Cleaning in Fulham

This Limestone tiled floor hadn’t been cleaned properly for 5 years and we were asked to clean and reseal, hopefully you can appreciate the improvement in the photographs.

Limestone Floor Before Limestone Floor Before

Cleaning Limestone Floor Tiles

The first step was to scrub the Limestone tiles with a rotary machine fitted with a black scrubbing pad and a solution of Tile Doctor Pro-Clean which is a strong multi-purpose alkaline cleaning product designed for use on stone. A strong dilution of Pro-Clean can remove sealer however it was apparent some sealer was still present on parts of the floor so Tile Doctor Remove and Go which is a dedicated coatings remover was applied to remove the remaining seal.

The floor was then rinsed thoroughly with clean water to remove any cleaning products and we then used the Twister Burnishing Pad system with a rotary machine to complete the cleaning process and polish the floor. The pads come in four different colours and you work your way through them one by one until the floor is thoroughly cleaned and polished.

Sealing Limestone Floor Tiles

Once the floor was dry we set about sealing it using two coats of Tile Doctor Ultra Seal which is a no-sheen natural look penetrating sealer designed to provide maximum stain protection on natural stone floors including Limestone, Granite and Marble. The last step was to buff the floor to a nice shine with a rotary machine fitted with a white pad.

Limestone Floor After Limestone Floor After

The customer was extremely happy with the result and has since recommended us to others.

Limestone Floor, Cleaned, Scrubbed, Polished and Sealed in Fulham

Limestone Tiled Floor Cleaning in Fulham Read More »

Ceramic Tile and Grout After

Soot damaged Grout cleaned and re-coloured in Warlingham

This job was completed to resolve an Insurance claim for a lady who lives in Warlingham whose bathroom tiles and grout had been damaged from smoke and soot. A building company had attempted to clean the tiles however the lady was not satisfied and told the insurance company it was to be done properly. On inspection the grout was still a bit dirty but I told her it was possible to clean it up, but could not guarantee it would be a uniform finish. I suggested that she could have the grout re-coloured at the same cost and gave her a small demonstration, she was happy with this and contacted the insurance company to get the go ahead; a week later she called me to book it in.

Ceramic Tile and Grout Before Ceramic Tile and Grout Before

Preparing the Tile and Grout for Re-colouring

When I started the job I went over it with the lady to make sure she was happy with the colour and if there were any other issues. She pointed out that on the border tiles had discoloured and on closer inspection I found that they were a marble tile and the builders had put a topcoat seal on them to make them shiny but because it was the wrong type of seal and it had started to peel.

As a result it was necessary to the sealer as so I put a coat of remove and go on the border tiles and left it to dwell; I also sprayed a solution of Tile Doctor Pro-Clean onto the ceramic wall tiles and scrubbed the tiles and grout before washing then down with warm water. By this time I could then scrub the border tiles in order to remove the old topcoat sealer. I dried the border tiles using my heat gun and the applied a coat of Ultra-Seal; the marble tiles had to be sealed before I could colour the grout.

Applying Grout Colourant

Once everything had been rinsed and the grout had dried I was able to apply the grout colourant using my colour applicator (toothbrush). Its meticulous work so it took a couple of hours to apply and by then I could go round to remove any excess colourant by spraying plain water and scrubbing with a white pad. I use a white pad, because if I used a coloured pad I could transfer the dye from the coloured pad to the seal.

Ceramic Tile and Grout After Ceramic Tile and Grout After

Once I had completed the whole room I checked to make sure everything was okay and found I needed to touch up a couple of areas. I then buffed all the tiles up and cleaned the bath, sink and floor and asked the lady to check it all before putting all my equipment and dust sheets back into the van. The lady was really happy with the result (see comment below) and has asked me to do the same work in her kitchen.

Bill worked continually throughout the day without a break. He was very polite and courteous He was full of knowledge and yes I would use again.

Kim Dehnert, Wallingham


Grout restoration in Warlingham

Soot damaged Grout cleaned and re-coloured in Warlingham Read More »

Fulham Victorian Floor After

Victorian Tiled Floor Restoration in Fulham

Details below of a Victorian tiled floor that we cleaned and sealed for a gentleman in Fulham South West London after he had refurbished his house and the workmen had left it worse for wear.

Victorian Floor Cleaning

I used a strong solution of Tile Doctor Pro-Clean diluted with hot water and applied to the floor and agitated using a rotary machine fitted with a black scrubbing pad. This worked to clean the floor and strip the existing sealer from the whole area, I then got on my hands and knees to scrub the edges and to check that all paint and glue had been removed. The soiled solution was removed using a wet vacuum and then rinsed three times before using an industrial steamer over the whole floor. This helps to neutralise and remove any products which could upset a sealer.

Fulham Victorian Floor Before Fulham Victorian Floor Before

Victorian Floor Sealing

I then left the floor to dry out and came back two days later to seal it. On my return I checked that all the chemicals had been removed and that there was no paint and muck left on the floor.

Once I was happy I then laid 6 coats of Tile Doctor Seal and Go which is an ideal sealer for Victorian tiled floors as it provides stain resistance with a low sheen finish. An industrial air mover was used to reduce drying times between coats. The last step was to buff the floor using a white buffing pad to harden the seal. The gentleman was really happy with the result and was pleased that the new tiles that had been laid as part of the renovation now blended in perfectly with the old tiles.

Fulham Victorian Floor After Fulham Victorian Floor After


Victorian Tiled floor cleaned and sealed in Fulham

Victorian Tiled Floor Restoration in Fulham Read More »

Central London Office Slate After

Slate Floor Cleaning at a Central London Office

I was asked by a building company to look at some slate flooring that was laid during a refurbishment to the offices of a German television station based in central London.
The architect was not happy because there appeared to be some grout haze and some grout along the ridges that you get in slate. I carried out a demonstration to the building manager and she was pleased with the result and we were awarded the job.

Because of the nature of the business I had to do the job out of hours, which suited me because there were 4 toilet areas to do over 6 floors and I was able to get on with the job without any interruption.

Central London Office Slate Before Central London Office Slate Before

Slate Tile Cleaning

On my arrival I laid a coating of Tile Doctor Remove and Go mixed 50/50 with NanoTech Ultra-Clean to 2 toilets and left it to dwell while I brought all my equipment in and set up. These two products together create a very powerful stripper cleaning solution ideal for the job in hand. I left the products to soak into the tiled slate floor of the first toilet for an hour before scrubbing it in using water and a hand scrubbing brush. The soiled solution was then removed using a wet vacuum and then rinsed and sprayed with Tile Doctor Grout Clean-Up to remove any remaining grout haze off the surface of the tile. The slate was the given two mores rinses with clean water before being left to dry.

Before starting on the next floor I left a mixture of Remove and Go and NanoTech Ultra-Clean to dwell on the next floor. I then carried on with this process described above until all the floors were cleaned.

Slate Tile Sealing

Once the floors were dry I put a single coat of Tile Doctor Colour Grow sealer down on each floor which is a sealer which really brings out the natural colour of the stone.
The client had requested a shiny final finish so the sealing was completed using two coats of Tile Doctor Seal and Go on each floor.

Central London Office Slate After Central London Office Slate After

When I had finished the site manager said that he couldn’t believe how nice they had come out and was looking forward to the reaction of the clients.

Cleaning and Sealing Slate in Central London Office

Slate Floor Cleaning at a Central London Office Read More »

Victorian Tiled Floor After

Victorian Tiled floor restoration in Lewisham

I’m not sure if Tile Doctor is the reason for this but there seems to have been a marked increase in the restoring of floors that have been found hidden under carpet; this particular floor was Victorian Tiles and the lady who owned the house had discovered it after lifting the carpet that had been down for 15 years and wanted to make a feature of it. The carpet had done a reasonable job of protecting it but it was dull and there were what appeared to be white paint spots on the surface.

Victorian Tiled Floor Before Restoration Victorian Tiled Floor Before Restoration

Cleaning a Victorian Tiled Floor

I started the cleaning process using a solution of Tile Doctor Nanotech Ultra-Clean which is an abrasive tile and stone cleaner mixed 50/50 with Tile Doctor Remove and Go which is a multi-purpose tile friendly stripper that can remove sealers and other coatings. The working space was quite tight so this was applied to half of the floor and left to soak in for an hour whilst I setup equipment. After an hour I scrubbed the floor using a rotary machine fitted with a black scrubbing pad and plain water. The soiled solution was then removed using a wet vacuum before repeating the process on the other half of the floor. The tiled floor was then rinsed twice thoroughly before using a steamer to clean deep into the pores of the Victorian Tile.

Sealing Victorian Tiles

The next step was to Seal the Floor but it needs to be dry first, fortunately I have an industrial airmover fan that speeds this along nicely. The floor was sealed using 5 coats of Tile Doctor Seal and Go which provides stain protection along with a low sheen finish that really brings out the beauty in Victorian Floor tiles. The transformation was quite evident and the owner has very happy with the result and left the following testimonial.

“Fab Service, Great result, Will Recommend.”

Victorian Tiled Floor After Restoration Victorian Tiled Floor After Restoration


Victorian Tiled Floor Cleaned and Sealed in Lewisham

Victorian Tiled floor restoration in Lewisham Read More »

Shower Grout Cleaning Caterham After

Tiled Shower Clean and Seal in Caterham

Shower problems must be the most common problem we come across at Tile Doctor where we often here of issues with discoloured shower tile and grout usually combined with a build up of mould. Discolouration problems tend to come from the dyes in bathroom products such as body washes and shampoo, where as mould is due to inadequate ventilation or extraction magnified by our cold damp climate as we keep the windows shut and increase insulation to reduce drafts and keep warm.

Removing Mould and Discolouration from Shower Grout

The photographs shown on this page come from a ceramic tiled shower cubicle in the Surrey town of Caterham which you may have heard of as it’s where they make the Caterham Sports Car. You should be able to see from the photographs areas of discoloration and mould on the grout and silicone sealant which unlike the glazed ceramic tiles are slightly porous and have allowed the dyes and mould to taken a hold.

Shower Grout Cleaning Caterham Before Shower Grout Cleaning Caterham Before
Shower Grout Cleaning Caterham Before

To resolve the problems with the tile and grout a strong solution of Tile Doctor Pro-Clean was mixed in a spray bottle and then sprayed on; mixing the product with air allows it to stick better onto the vertical surface otherwise gravity causes it to run off. The Pro-Clean was allowed to dwell onto the surface for a few minutes before being worked in with a grout brush. The next step was to rinse the Pro-Clean down and then re-apply the process to areas which we had missed or needed further attention.

The tile was then left to dry before replacing the silicone sealant between the tile and shower tray; whilst Tile and Grout can normally be treated once mould gets a hold on the silicone the only thing you can do is to replace it. In some cases I’ve come across the grout becomes too stained to treat and in that case the only thing you can do is scrape the top layer of grout back using a screwdriver head sized to fit into the grout line.

Shower Grout Sealing

The last step was to seal the grout for which we used Tile Doctor Pro-Seal which is a penetrating sealer rather than one that sits in the surface. The sealer should prefect staining in future however given the location it will need to be re-applied more frequently than usual.

Shower Grout Cleaning Caterham After Shower Grout Cleaning Caterham After
Shower Grout Cleaning Caterham After


Shower Tile Cleaning in Caterham, Surrey

Tiled Shower Clean and Seal in Caterham Read More »

Limestone Tile After Strip and Seal

Limestone Tiled Floor Strip and Seal in Wimbledon

Details below of a Limestone tiled floor strip and seal job we did recently for a lady in Wimbledon, South West London. It was a fairly common Limestone problem which had lost its polished appearance and was looking dull.

Stripping the Limestone Tiled Floor

To resolve we had to stripped back the Limestone surface using a set of burnishing pads, these diamond encrusted pads come in a number of different colours each one does a different job from scrubbing to polishing. I started with the red pad together with water and then carried on with the white, then yellow pads using water. Finally when I had dried the floor I used a green pad to buff the floor up. This activity took most of the day so left the floor to dry overnight.

Limestone Tiled Floor in Wimbledon Limestone Tiles in Wimbledon

Sealing the Limestone Floor

The next morning I arrived to find the floor had dried out enough for me to seal it which was done using a couple of coats of Tile Doctor Colour Grow which is a great sealer for lifting the natural colours in the Limestone floor as well as providing stain protection. Once the sealer had dried I then finished it all off with a quick buff using a white buffing pad.

Limestone Tile After Strip and Seal Limestone Tile After Strip and Seal

I’m not sure the photographs really show the difference in the floor however I can tell you that when the lady returned home from work that day she was over the moon with the transformation and wrote the following testimonial:

So pleased with the service and advice received. Prompt and Professional, My floor looks like new again. Would highly recommend and use again. Thank you.


Limestone Floor Restoration in Wimbledon

Limestone Tiled Floor Strip and Seal in Wimbledon Read More »

Victorian Floor Cleaned part Sealed in Richmond

Victorian Tiled Hallway Restoration in Richmond

Set of photographs here from a Victorian Tiled floor in a block of flats in Richmond Upon Thames. The floor was in the communal hallway and as a result had seen a lot of traffic and was looking very dull and in need of a good clean and re-seal.

Victorian Floor before cleaining in Richmond

Cleaning the Victorian Tiled Floor

The floor was cleaned using a dilution of Tile Doctor Pro-Clean which had been left to dwell for 20 minutes before being agitated using a rotary machine fitted with a black scrubbing pad. We use a wet vacuum to remove the dirty cleaning solution before thoroughly rinsing the floor down with clean water to remove any remaining cleaning product that might have an adverse effect on the sealer. The floor was left to dry assisted by the use of a warm air blower.

Victorian Floor Cleaned and partly Sealed in Richmond

Sealing the Victorian Tiled Floor

Having the right equipment can make light work of cleaning a large area and the blower meant we were soon looking at sealing the floor. The trouble with working in a communal area however is we had residents coming and going so we had to seal the floor in two halves. We used Tile Doctor Pro-Seal to seal the floor; it’s more expensive than some but gives a natural look whilst penetrating deeper into the tile to provide maximum stain protection, something you need in high traffic areas.

When the rest of the floor was completed and left to dry for an hour I used a rotary machine fitted with a white buffing pad to harden the floor up.

The managing agent was really pleased because she received a lot of calls from the residents to thank her as this floor hadn’t been cleaned and sealed for a lot of years.

Victorian Floor Cleaned Sealed in Richmond
 

Victorian Floor Cleaned and Sealed in Richmond Upon Thames

Victorian Tiled Hallway Restoration in Richmond Read More »

Travertine Wall Tiles after Cleaning

Travertine Wall Tile Shower Refresh in Wandsworth

These travertine wall tiles were laid in a brick pattern in a large shower cubicle in a house in Wandsworth, South London. As you can see the tiles hadn’t been cleaned for a couple of years and had become discoloured from the shampoo dyes etc, there was also some mould which is a common problem in wet areas and usually down to insufficient ventilation. The owner wanted to sell her house and was keen to get the shower looking like new again.

Cleaning Travertine Wall Tiles

We cleaned the Travertine wall tiles using a dilution of Tile Doctor Pro-Clean. It’s always best to leave Pro-Clean to dwell for a few minutes before cleaning so it can get to work on the dirt, as you would expect however liquids will simply run down a wall tile so the trick here is to apply the solution using a spray attachment; the idea behind this is to combine the product with air so it becomes lighter and sticks to the tile. Then next step is to get in with a small stiff scrubbing brush and really work the solution into the tile and grout and loosening the dirt along the way and the wash the wall down with water to remove any cleaning products.

Travertine Wall Tiles Before Cleaning Travertine Wall Tiles Before Cleaning

Sealing the Travertine Wall Tiles

The wall was wiped down and allowed to dry for before applying the sealer. There are a number of products you can use for sealing Travertine and in this case I used Tile Doctor Ultra Seal which provides stain protection without changing the appearance of the tile. The last step was to remove and replace the silicone seal between the Travertine tile and the shower tray, there was some mould build up on the original silicone which wants it gets a hold into the silicone it cannot be removed and so it’s always best to replace. At the end I had one happy customer and I think you will agree I achieved the aim of making it look like new again.

Travertine Wall Tiles After Cleaning Travertine Wall Tiles After Cleaning
Travertine Wall Tiles Finished


Wandsworth Travertine Shower Refresh

Travertine Wall Tile Shower Refresh in Wandsworth Read More »

line Textured slate kensington sealed

Removing Limescale from a Slate Tiled Floor in Kensington

We were asked to look a bathroom at a flat in Kensington by a property management company; the slate tiled floor was textured with lines and the stone was affected by a number of problems including limescale and grout haze which had been partly sealed in. The owner was at the property when I arrived and I was able to demonstrate how it was possible to remove the limescale and grout haze using Tile Doctor Grout Clean-up which is an acid based product and so was given instructions to complete the job.

Line Textured Slate Kensington Before

Removing Limescale from Textured Slate

Armed with more quantities of Grout Clean-Up we were able to remove the limescale from the surface of the slate tile. The floor was then rinsed and then covered with Tile Doctor Remove and Go in order to remove the remaining sealer. We had to repeat this process twice in order to remove the grout haze that had been locked in under the sealer.

Sealing Textured Slate

After a thorough rinsing down to ensure no products remained on the floor we left it to dry and returned later to apply three coats of Tile Doctor Colour Grow which will provide future protection and as you can see from the photographs really helped to give the floors appearance..

Line Textured Slate Kensington Partly Sealed Line Textured Slate Kensington Sealed

I then explained how to clean the tiles going forward. She was extremely happy with the work carried out and also pleased with the management company for contacting us in the first place.

Removing Limescale from a Slate Tiled Floor

Removing Limescale from a Slate Tiled Floor in Kensington Read More »

Black Porcelain Floor after photo

Putting the Shine Back on Black Porcelain Floor Tiles

We were asked to clean and seal these black Porcelain floor tiles that had been laid in a bridal shop in the Lakeside shopping centre. The shop fitters and builders had been in to setup the internal layout and the floor was looking dull and not in a presentable state good enough for the shop opening.

Black Porcelain Floor Before Photo

Cleaning black Porcelain floor tiles

We set about scrubbing the floor using a dilution of Tile Doctor Pro-Clean Tile and Grout cleaner followed by a thorough rinse. We then waited for it to dry before buffing the porcelain tile surface to a deep shine with a white buffing pad.

The floor was ready for sealing so we applied Tile Doctor Ultra Seal to a small test area but it didn’t take, not wishing to waste our time or the customers’ money we called it a day. Most porcelain tiles won’t take a sealer however some are micro porous and do need sealing so it’s always best to check.

Black Porcelain Floor After Photo
They were really pleased with result and they were even happier we were honest about not charging them for not sealing the floor; the deep shine on the floor really did look spectacular.

Black Porcelain Floor Photo
 

Restoring the Shine on Black Porcelain Floor Tiles

Putting the Shine Back on Black Porcelain Floor Tiles Read More »

Marylebone Slate After Restoration

Slate Tiled Floor in Marylebone, London

The customer was an American lady who lived in a flat in Marylebone right in the centre of London; she worked in the City and had the slate tiles in her kitchen cleaned and sealed by another company the year before and she had not been impressed with the results.

I had provided a quote and did a small demonstration on the floor to give her an idea of how the finished result would look; having been unhappy with the previous company we had to work hard to win her confidence but the demo combined with photographs and testimonials from previous work that we had done managed to assure her we could complete the job to the right standard.

Cleaning the Slate Tiled Floor

Having turned up at 7am so that she could get to work we set about scrubbing the slate tiled floor with Tile Doctor Pro-Clean and a rotary machine fitted with a black pad, we used a grout brush to clean out the grout lines and then rinsed the floor thoroughly with clean water before switching on a air blower to help the floor to dry.

Marylebone Slate Before Restoration

Sealing the Slate Tiled Floor

Once the floor was dry we proceeded to seal it with Tile Doctor Seal and Go which provides good stain protection with a low sheen finish, slate is quite porous and it took five coats before it was fully sealed.

That night I received a call from the lady thanking me for such a good job and not only was she pleased with the work but we were half the price of the original company.

Marylebone Slate After Restoration
 

Cleaning and Sealing a Slate Tiled Floor in Marylebone, London

Slate Tiled Floor in Marylebone, London Read More »

=================================

South London Tile Doctor

================================= Read More »

Scroll to Top