Ceramic Tile Cleaning

Welcome to my Work History archive where you will find detailed examples of Ceramic Tile and Grout Cleaning/Renovation work carried out in South London

Cleaning Ceramic Tiles

Ceramic tiles are usually fully glazed and so do not have any pores that dirt can become ingrained into, because of this they are easy to clean with Tile Doctor Neutral Cleaner and are generally low maintenance. Textured ceramic tiles however are one exception, they have a rough surface in order to make them less slippery and are often used around wet areas such as swimming pools. Dirt is easily trapped in the textured surface and to get these clean requires a more intensive clean ideally using a rotating scrubbing pad.

Due to their low maintenance we rarely get called to deep clean Ceramic tiles however grout is a different case. The top layer of grout is actually porous and due to it being recessed we find when they are mopped it leads to a build-up of dirt on the grout causing it to discolour. This can be resolved using Tile Doctor Pro-Clean and then once clean and fully dry, seal the grout with one coat of Tile Doctor Ultra-Seal using a pipette.

Ceramic tiles are used a lot in bathrooms and shower cubicles where again we find it’s usually the grout or silicone sealant that discolours before the tiles do. In these cases we often find the appearance can be greatly improved with the use of a Grout Colourant and replacement of the silicone.

Below you will find detailed examples of work we have carried out in the past, it should give you some idea of what’s involved and what can be achieved with the right techniques and products


Bathroom Floor Grout Restoration in Tooting SW17

Bathroom Floor Tile Grout Restoration in Tooting SW17

A client was renovating a house in Tooting and wanted to see what could be done to improve the Ceramic floor tiles in the bathroom without the expense of a major overhaul. Having discussed the floor over the phone I was confident it could be improved and agreed a date to come over and survey the tiles and provided a quote for their renovation.

Bathroom Floor Grout Before Restoration in Tooting SW17

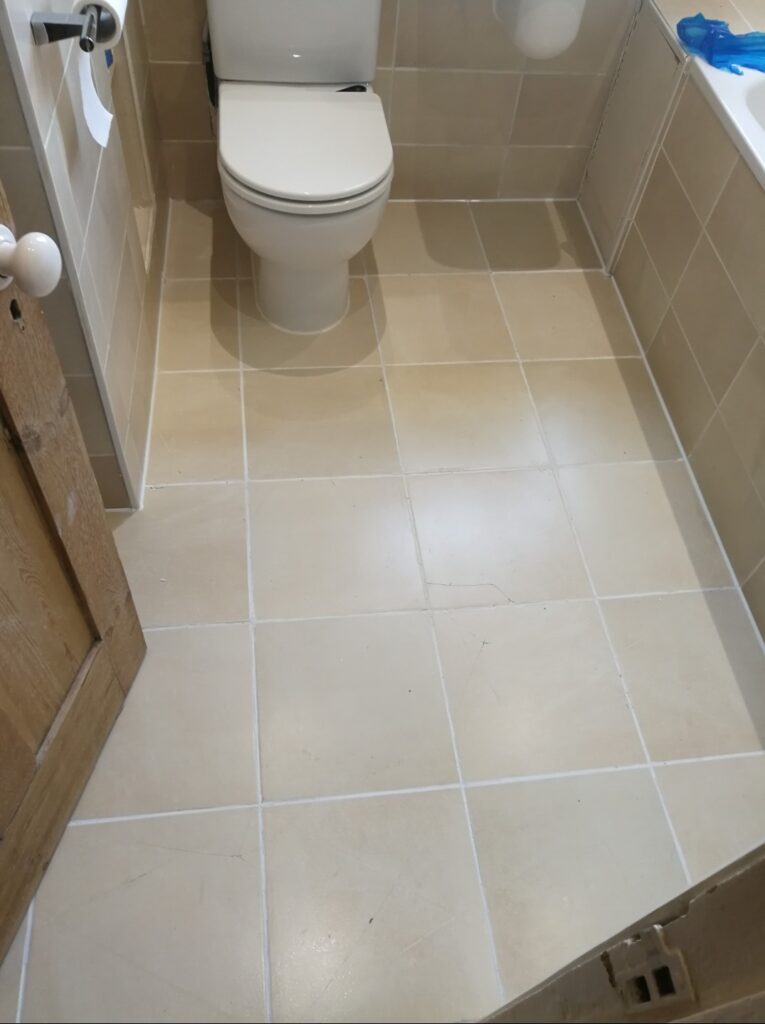
Except for one cracked tile, the tiles were in good condition and I could see it was really the grout that was bringing the bathroom down. The grout was generally discoloured and some had cracked and become loose. This cracking issue is indicative of using an inflexible grout when tiling on a wooden floor as these floors tend to have a bit of movement in them.

I discussed my renovation plan with the customer and provided a quote for carrying out the work which was accepted.

Renovating Bathroom Floor Grout

On the first day I set about raking out the cracked grout and stripping out the silicone between the tile and the bath. Silicone seems to attract mould and although it can be cleaned to some extent, I usually find its more effective to simply replace it. I then tidied up the bathroom to remove the waste grout and silicone, so the area was ready for grouting. I used a flexible White grout for this in order to match the original, although most of that was no longer White due to the staining.

I left the grout to set overnight and returned the next day to complete the job starting with the re-application of the silicone sealant, again in White but this time using an anti-mould variety. My attention then turned to the floor tile grouting which of course was now a mixture of fresh new grout and stained grout. I had realised this would be the result, so I had come prepared and was ready to apply Tile Doctor Grout Colourant in white to make everything uniform.

Before applying the colourant, I prepped the grout joint with Tile Doctor Pre-treat cleaner that is an acidic cleaning solution that is sprayed onto the grout and then scrubbed in. This cleans the grout joints, and the acidic nature of the cleaner helps prepare the grout to achieve a better bond with the colourant. The grout was then wiped with a wet sponge to remove the dirt and then dried ready for the colourant. Although the cleaner had helped to clean the grout and remove surface dirt it can’t do anything about deep seated staining, so colouring was still necessary.

Once the grout was dry the White grout colourant was painted onto the grout using a small brush wiping off any excess from the tile as I went. The Tile Doctor range of Grout Colourants come in eleven different colours and form an epoxy barrier over the grout preventing dirt from reaching the grout line and making it much easier to keep clean.
Bathroom Floor Grout After Restoration in Tooting SW17

Once the colourant had dried, I gave the floor a quick clean with Tile Doctor Neutral Tile Cleaner to get the ceramic tiles clean and the job was complete. The refreshed grout now has a consistent white appearance, and it really lifted the appearance of the bathroom.


Professional Restoration of a Bathroom Floor Grout in South London

Bathroom Floor Tile Grout Restoration in Tooting SW17 Read More »

Shower Tile and Grout Cleaned and Renovated in Battersea Shower Cubicle

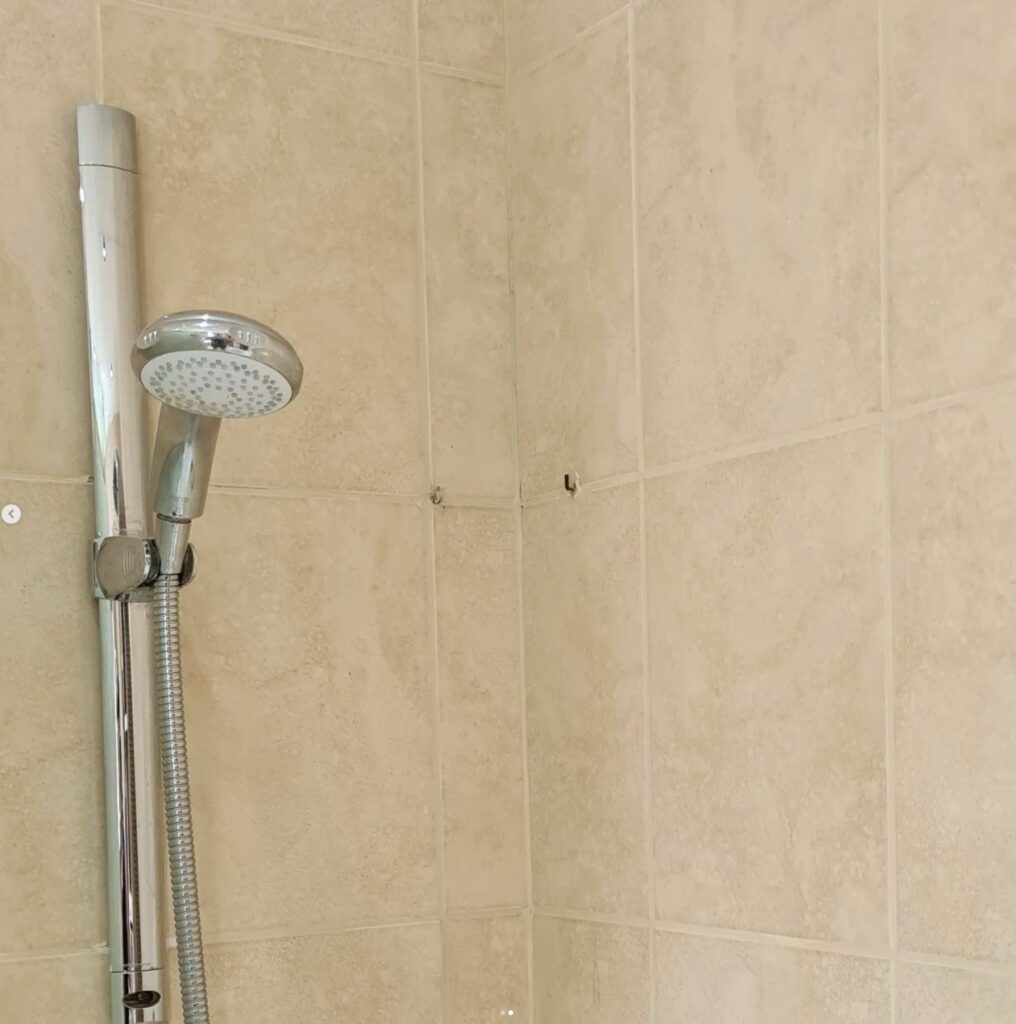
Ceramic Tiled Shower Cubicle Refreshed in Battersea

I was contacted by a customer in Battersea who was concerned about the state of their Ceramic Tiled shower cubicle. Ceramic tiles are glazed so usually very easy to keep clean however grout has a rough surface and attracts dirt easily. Where this happens it best to keep on top of the problem with regular cleaning as once you get a deep-seated stain on grout it’s very difficult to get it clean again.

The photograph below shows the worst of the problem where dirt had collected behind a wire basket that was fixed to the wall. The basket allowed dirt to build-up behind it and had deposited rust on the tile and grout.

Ceramic Shower Before Tile Cleaning Battersea

Maintaining grout is a large part of the work Tile Doctor does and we have several tried and tested products and processes for doing this. Having spoken to the client over the phone and having been sent photographs via email I created a quote for the work which should only take a few hours. My customer was happy with the quote and we agreed a date to do the work.

Cleaning a Ceramic Tiled Shower Cubicle

To begin, I cleaned the grout lines using our acidic cleaning product, Tile Doctor Grout Clean-Up. The product is decanted into a spray bottle and sprayed onto the tile and grout where it was left to dwell for ten minutes before being scrubbed in with a handheld scrubbing brush. Spraying the solution onto the wall mixes it with air to make it lighter and more able to stick to the wall.

Being a concentrated phosphoric acid cleaner, Grout Clean-Up effectively removes mineral deposits including rust and old grout smears from the tile surface to leaving it looking much fresher, it also prepares the grout for a superior bond with the grout colourant that was to be added later.

Following this, I rinsed down the tile and grout with water to remove the dislodged dirt. The next step was to remove all the existing silicone mastic with a sharp knife; the mastic sealant stained with mould and much in need of replacement. Once all the rubbish was swept out, I dried any remaining dampness from the grout and tiles with a heat gun.

I then moved onto to recolouring the grout using a Tile Doctor Grout Colourant which is simply painted onto the grout lines using a small brush and any excess wiped of the tile before it dries. There are eleven colours available in the Tile Doctor colourant range and in this case, we chose a colour to match the tiles.

Ceramic Shower After Tile Cleaning Battersea

The application of Grout Colourant not only colours the grout joints – it also seals the grout in so dirt can’t become stuck in its rough surface, this also makes it very easy to clean going forward.

Once the restoration was finished, I resealed the shower base with fresh mould resistant silicone mastic to match the tile and grout. Tile Doctor don’t sell this but there are many makes available from local DIY stores.


Ceramic Tiled Shower Cubicle Cleaning and Grout Recolouring in South London

Ceramic Tiled Shower Cubicle Refreshed in Battersea Read More »

Bathroom Floor Grout Cleaning Colouring Gipsy Hill

Bathroom Floor Tile Grout Renovated in Gipsy Hill SE19

The Grout on this tiled floor in the bathroom of a property near Gipsy Hill SE19 was as you can see from the photo below in a bit of state. Originally White the colour of the grout had darkened to black in numerous areas and was bringing down the appearance of what was a lovely bathroom.

The floor tiles were Travertine effect Ceramic or Porcelain and as you would expect with tiles of this nature in very good condition. Ceramic and Porcelain tiles are not porous and so very easy to maintain, however what tends to happen is the dirt is washed off the tiles straight into the adjacent grout line where due to the rough nature of the grout it gets stuck.

Bathroom Floor Grout Before Cleaning Gipsy Hill

My renovation plan for tackling dirty grout is to start with a strong grout cleaner like Tile Doctor Pro-Clean and if the staining is still evident apply a Grout Colourant. I discussed this plan with owner of the property who were happy that one way or another the problem was about to be resolved.

Cleaning a Natural Black Ceramic Tiled Bathroom Floor

The first step in renovating this floor was to tackle the grout which was clearly the biggest issue with this floor. This work started by applying a strong dilution of Tile Doctor Pro-Clean along the grout lines and then waiting for about ten minutes before scrubbing it in with a wire brush. I also used a 6-inch Black scrubbing pad fitted to a hand-held polisher to clean the tiles which as mentioned earlier only needed a light clean. The floor was then rinsed with water and then dried with a wet vacuum to remove the excess water and slurry from the cleaning.

The grout responded well to the treatment but unfortunately the staining was simply too deeply seated to make it look new again so I decided to adopt plan B and apply a White Grout Colourant. These colourants have the added advantage of sealing in the grout and are very easy to clean.

The grout was force dried and then once I was happy it was dry enough, I started the process of applying the grout colourant to the grout lines. Grout Colouring is a straightforward and involves using a small brush to paint the colourant onto the grout and then wiping the excess off the tile as you go. We find a wet wipe works well for this. Two coats of Grout Colourant were applied.

Bathroom Floor Grout After Cleaning Colouring Gipsy Hill

Whilst that was drying, I stripped out the silicone sealant around the edges of the bathroom and replaced with new. This last step really finished off the transformation and it would have been obvious if I had missed it.

Once finished the floor looked like a new installation and the Grout Colourant should keep it looking that way for many years to come.


Professional Bathroom Floor Grout Cleaning and Colouring in South London

Bathroom Floor Tile Grout Renovated in Gipsy Hill SE19 Read More »

Ceramic Tile and Grout After

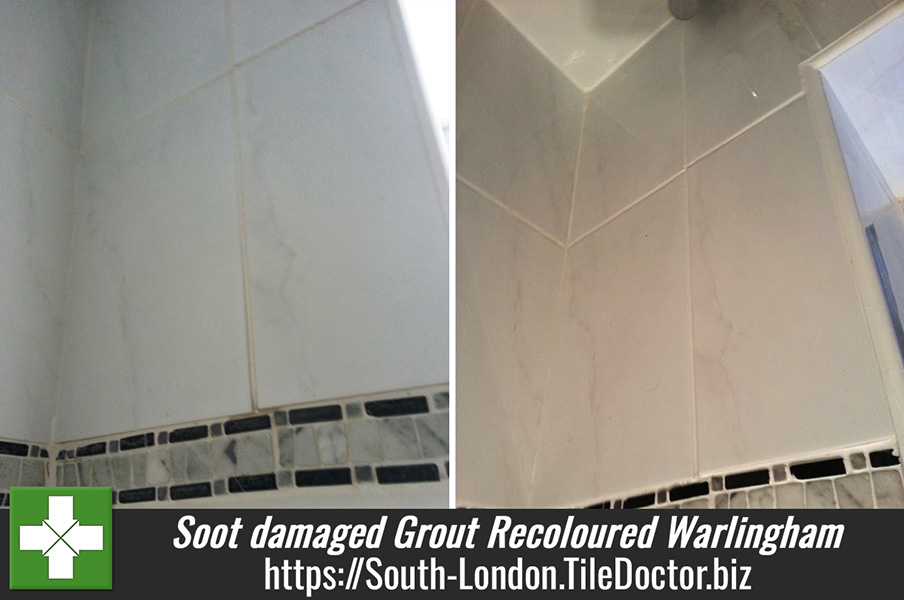
Soot damaged Grout cleaned and re-coloured in Warlingham

This job was completed to resolve an Insurance claim for a lady who lives in Warlingham whose bathroom tiles and grout had been damaged from smoke and soot. A building company had attempted to clean the tiles however the lady was not satisfied and told the insurance company it was to be done properly. On inspection the grout was still a bit dirty but I told her it was possible to clean it up, but could not guarantee it would be a uniform finish. I suggested that she could have the grout re-coloured at the same cost and gave her a small demonstration, she was happy with this and contacted the insurance company to get the go ahead; a week later she called me to book it in.

Ceramic Tile and Grout Before Ceramic Tile and Grout Before

Preparing the Tile and Grout for Re-colouring

When I started the job I went over it with the lady to make sure she was happy with the colour and if there were any other issues. She pointed out that on the border tiles had discoloured and on closer inspection I found that they were a marble tile and the builders had put a topcoat seal on them to make them shiny but because it was the wrong type of seal and it had started to peel.

As a result it was necessary to the sealer as so I put a coat of remove and go on the border tiles and left it to dwell; I also sprayed a solution of Tile Doctor Pro-Clean onto the ceramic wall tiles and scrubbed the tiles and grout before washing then down with warm water. By this time I could then scrub the border tiles in order to remove the old topcoat sealer. I dried the border tiles using my heat gun and the applied a coat of Ultra-Seal; the marble tiles had to be sealed before I could colour the grout.

Applying Grout Colourant

Once everything had been rinsed and the grout had dried I was able to apply the grout colourant using my colour applicator (toothbrush). Its meticulous work so it took a couple of hours to apply and by then I could go round to remove any excess colourant by spraying plain water and scrubbing with a white pad. I use a white pad, because if I used a coloured pad I could transfer the dye from the coloured pad to the seal.

Ceramic Tile and Grout After Ceramic Tile and Grout After

Once I had completed the whole room I checked to make sure everything was okay and found I needed to touch up a couple of areas. I then buffed all the tiles up and cleaned the bath, sink and floor and asked the lady to check it all before putting all my equipment and dust sheets back into the van. The lady was really happy with the result (see comment below) and has asked me to do the same work in her kitchen.

Bill worked continually throughout the day without a break. He was very polite and courteous He was full of knowledge and yes I would use again.

Kim Dehnert, Wallingham


Grout restoration in Warlingham

Soot damaged Grout cleaned and re-coloured in Warlingham Read More »

Shower Grout Cleaning Caterham After

Tiled Shower Clean and Seal in Caterham

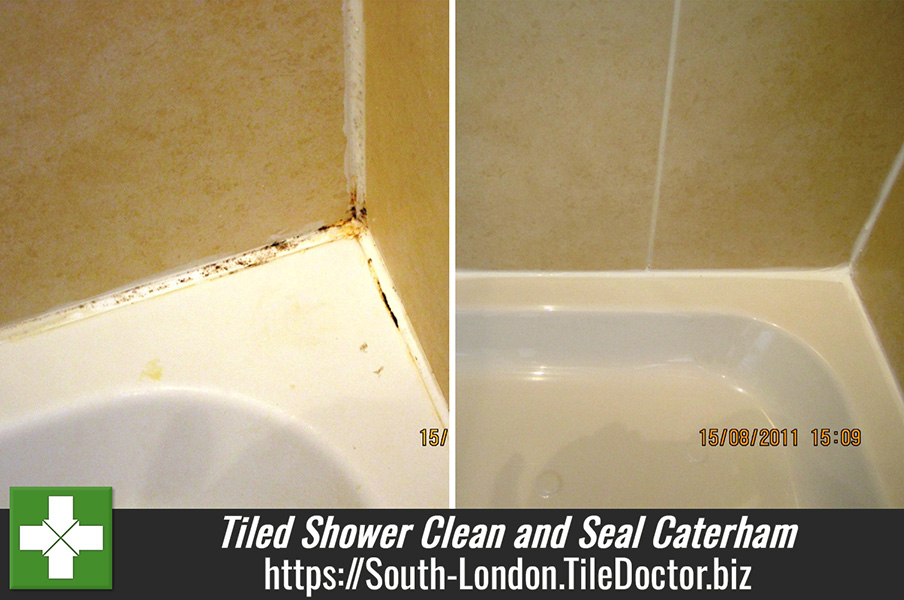
Shower problems must be the most common problem we come across at Tile Doctor where we often here of issues with discoloured shower tile and grout usually combined with a build up of mould. Discolouration problems tend to come from the dyes in bathroom products such as body washes and shampoo, where as mould is due to inadequate ventilation or extraction magnified by our cold damp climate as we keep the windows shut and increase insulation to reduce drafts and keep warm.

Removing Mould and Discolouration from Shower Grout

The photographs shown on this page come from a ceramic tiled shower cubicle in the Surrey town of Caterham which you may have heard of as it’s where they make the Caterham Sports Car. You should be able to see from the photographs areas of discoloration and mould on the grout and silicone sealant which unlike the glazed ceramic tiles are slightly porous and have allowed the dyes and mould to taken a hold.

Shower Grout Cleaning Caterham Before Shower Grout Cleaning Caterham Before
Shower Grout Cleaning Caterham Before

To resolve the problems with the tile and grout a strong solution of Tile Doctor Pro-Clean was mixed in a spray bottle and then sprayed on; mixing the product with air allows it to stick better onto the vertical surface otherwise gravity causes it to run off. The Pro-Clean was allowed to dwell onto the surface for a few minutes before being worked in with a grout brush. The next step was to rinse the Pro-Clean down and then re-apply the process to areas which we had missed or needed further attention.

The tile was then left to dry before replacing the silicone sealant between the tile and shower tray; whilst Tile and Grout can normally be treated once mould gets a hold on the silicone the only thing you can do is to replace it. In some cases I’ve come across the grout becomes too stained to treat and in that case the only thing you can do is scrape the top layer of grout back using a screwdriver head sized to fit into the grout line.

Shower Grout Sealing

The last step was to seal the grout for which we used Tile Doctor Pro-Seal which is a penetrating sealer rather than one that sits in the surface. The sealer should prefect staining in future however given the location it will need to be re-applied more frequently than usual.

Shower Grout Cleaning Caterham After Shower Grout Cleaning Caterham After
Shower Grout Cleaning Caterham After


Shower Tile Cleaning in Caterham, Surrey

Tiled Shower Clean and Seal in Caterham Read More »

=================================

South London Tile Doctor

================================= Read More »

Scroll to Top